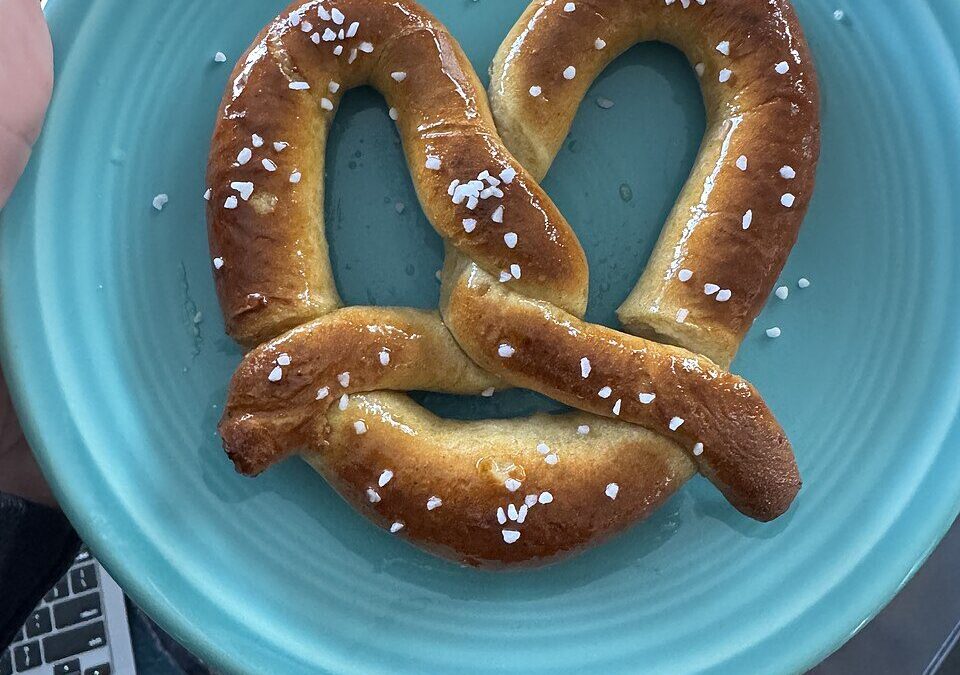
My first tray of pretzels came out beige. Not golden, not mahogany, just beige, like a dinner roll that had lost its nerve halfway through baking. They tasted fine. They looked like nothing anybody would call a pretzel.
I had skipped the baking soda bath. I’d read the word lye in a forum thread, decided the whole bath business sounded like chemistry I hadn’t signed up for, and brushed the shaped dough with egg instead. Fourteen minutes at 425F later I had six pale knots and one useful lesson: the bath isn’t a garnish step. It’s the step.
The batch that came out beige
Here’s what actually goes missing without it. Egg wash browns the way enriched bread browns, a flat light tan, more or less even across the whole surface. Pretzel colour behaves differently. It’s uneven on purpose, near-black on the raised ridge of the twist, lighter down in the valleys where the loops sit close together, and it shows up late, usually in the last three or four minutes of the bake.
The flavour gap is wider than the colour gap. A properly bathed pretzel has a faint mineral tang sitting right on the crust, the thing that makes you reach for the second one before you’ve finished the first. Mine had none of it. My brother ate two and asked, very politely, whether they were meant to be bagels.
So I made them again the following Sunday and did the bath properly. Same dough, same oven, same 14 minutes. The difference was not subtle.
Getting over the bath, in about ten minutes
Baking soda in boiling water raises the pH of the dough’s surface, and a high-pH surface browns much faster and much darker in the oven. That’s the whole mechanism. It isn’t lye, it isn’t dangerous in any meaningful way, and half a cup of baking soda in 10 cups of water is a solution you could put your finger in without incident.
Two practical things I wish someone had told me. The pot foams violently the second the baking soda hits the water, so add it a spoonful at a time with the pot off the boil, and use a pot at least twice as deep as the water level. And the water turns cloudy and slightly slick. That’s normal.
I wrote the bath out in more detail, including what happens if you leave things in too long, over on my recipe for homemade pretzel bites. Bites are the better place to start if you’ve never done this, because a bite spends 20 seconds in the bath and can’t tangle. Full-size pretzels ask more of you at the shaping stage, which is what this recipe is really about.
Ingredients
- 1 1/2 cups warm water (about 110F)
- 2 1/4 teaspoons active dry yeast (one packet)
- 1 tablespoon brown sugar to feed the yeast and add depth
- 4 to 4 1/2 cups all-purpose flour, plus more for dusting
- 2 teaspoons fine salt for the dough
- 2 tablespoons unsalted butter, melted
- 1/2 cup baking soda for the bath (this is not a typo)
- 10 cups water for boiling the bath
- 1 large egg, beaten, for the egg wash
- Coarse pretzel salt or flaky sea salt for topping
- 2 tablespoons melted butter for brushing after baking
Instructions
- In a large bowl, combine the warm water, yeast, and brown sugar. Let it sit for 5 minutes until foamy, a sign your yeast is alive and ready.
- Add the melted butter, salt, and 4 cups of flour. Stir until a rough dough forms, then knead for 5 to 7 minutes, adding flour as needed, until smooth and only slightly tacky.
- Place the dough in a greased bowl, cover, and let it rise in a warm spot for about 45 minutes, until roughly doubled.
- Preheat the oven to 425F and line two baking sheets with parchment. Bring the 10 cups of water to a boil in a wide pot and carefully add the baking soda; it will fizz up, so add it slowly.
- Punch down the dough and divide it into six pieces. Roll each into a rope about 20 inches long, then shape into a classic pretzel by forming a U, crossing the ends, twisting once, and pressing them onto the base.
- Lower each pretzel into the simmering bath for about 30 seconds, spooning water over the top. Lift out with a slotted spatula, letting excess drip away, and place on the prepared sheets.
- Brush each pretzel with beaten egg and sprinkle generously with coarse salt while still wet so it sticks.
- Bake for 12 to 15 minutes, until deeply golden brown. Brush with melted butter the moment they come out of the oven for a glossy, rich finish.
Rolling a 20-inch rope that doesn’t fight you
This is where most home batches go sideways, and it has nothing to do with skill. It’s gluten. A rested dough rolls long and stays long; an unrested one springs back to 12 inches every time you lift your hands, and you end up pressing harder, which flattens the rope into a strap.
Divide the risen dough into six pieces, roll each into a short fat log, cover with a tea towel, then walk away for five minutes. When you come back, the same dough that refused to stretch runs out to 20 inches with barely any pressure.
Roll from the middle outward with flat palms, moving your hands apart as you go, and keep the work surface bare. No flour. A dusted counter gives the rope nothing to grip, so it slides instead of stretching. If your hands get sticky, wipe them, don’t flour them.
Aim for a rope about an inch across at the centre, tapering to pencil-thickness at the tips. That taper is what gives you the classic look, a fat belly and thin arms. Roll it evenly thick the whole way and the finished pretzel reads as a knotted breadstick.
The twist, slowly
Lay the rope on the counter in a wide U with the ends pointing away from you. Lift both ends, cross them once, then twist a second time so the ends swap sides again. Bring the twisted ends down onto the fat bottom curve of the U and press them firmly, about two-thirds of the way apart, so each end sits on its own side rather than both landing in the middle.
Press harder than feels necessary. The bath softens the surface, and any join that isn’t properly welded will pop open in the water, which is how you end up with a pretzel-shaped thing that unravels into a squiggle on the tray. I lost two out of six this way the first time.
One more thing that took me embarrassingly long to work out: shape the pretzels directly on parchment squares, then lower each one on its parchment near the water and slide it off. Trying to lift a floppy raw pretzel by hand distorts it every single time.
What I’d change next time
I’d chill the shaped pretzels for 15 minutes in the fridge before the bath. Cold dough is firmer, holds its twist through the 30 seconds of boiling, and doesn’t stretch when you lift it. This isn’t in the recipe above because it isn’t required, but it’s the single easiest way to make the shape survive.
I’d also go lighter on the salt than instinct says. Coarse pretzel salt looks sparse on wet dough and then tastes aggressive out of the oven, because the crust shrinks slightly and the crystals bunch. Six to eight crystals per pretzel is plenty.
And I’d stop pulling them at 12 minutes. Every batch I’ve regretted has been underbaked. At 12 minutes they look done; at 15 they look almost too dark, and that’s where the flavour lives. If the tops of the ridges are the colour of a chestnut, you’re there.
They’re best within about four hours, which is not what anyone wants to hear. Day-two pretzels go leathery on the outside and dry through the middle. If you want something from the same family that keeps properly overnight, soft dinner rolls use nearly the same enriched dough logic and are still good the next morning, and honey oat bread holds for three days without complaint. If you do have leftovers, split them, butter the cut sides, and put them under a hot grill for 90 seconds. That’s the only reheat that’s ever worked for me.