Skip to content
Baking

Everything Bagels

Everything Bagels

A bagel is a bread roll that has been deliberately made difficult. Stiff dough, a long cold rest, a dip in boiling water, then a hot oven. Every one of those steps exists to do something specific to the starch and gluten, and if you understand which does what, you can tell within thirty seconds of touching the dough whether the batch is going to work.

I make eight most weekends, and my first dozen attempts were bread rolls with holes. What follows is everything I would have wanted written down at the time.

Prep: 30 mins   Cook: 25 mins   Serves: 8

What Separates a Bagel From a Roll

Chew. Specifically, a dense, elastic crumb that resists your teeth and springs back a little, wrapped in a thin crust that is glossy rather than crisp.

Three decisions produce it. Low hydration, meaning less water relative to flour than any normal bread, which keeps the crumb tight rather than open. High protein flour, which builds the gluten network behind the resistance. And the boil, which gelatinises the outside and locks the surface before the oven can inflate it.

Take away any one of the three and you get something else. Skip the boil and you have a savoury roll. Use plain flour and you get a soft, fluffy ring closer to a dinner roll. Add more water and you drift toward focaccia territory, which is lovely but is not this.

Flour Protein, the One Thing Not to Substitute

Bread flour typically runs 12 to 14 percent protein against all-purpose at roughly 10 to 11.5. That gap sounds small on paper and is enormous in the hand.

Protein content sets how much gluten the dough can build, and gluten is the pull you are after. In a soft wet dough the difference is subtle. In a stiff dough at this hydration, where there is barely enough water to go around, the higher-protein flour is what stops the crumb going short and crumbly.

If bread flour is unavailable, all-purpose gives an edible bagel with maybe seventy percent of the chew. Do not compensate by adding more flour. That makes a dry bagel, not a chewier one.

Why the Dough Feels Wrong When You Start

Four cups of bread flour to a cup and a half of water lands near 62 percent hydration. A sandwich loaf sits closer to 68, a ciabatta above 75. This dough looks shaggy and refuses to come together for the first two or three minutes, and every instinct will tell you to splash in more water.

Don’t. Ten full minutes of kneading turns it smooth, dense and slightly tacky, like firm modelling clay. My stand mixer complains audibly on the hook, which is normal. By hand it is closer to kneading pasta dough than bread.

The test: press a thumb into the kneaded ball. It should leave a clear dent that fills back only halfway after a few seconds. If the dent vanishes instantly, keep kneading.

Ingredients

  • 4 cups bread flour, for maximum chew, plus extra for kneading
  • 2 1/4 teaspoons instant yeast, one standard packet
  • 1 1/2 cups warm water, around 110°F
  • 2 tablespoons brown sugar, feeds the yeast and adds flavor
  • 2 teaspoons salt
  • 1 tablespoon barley malt syrup or honey, for the boiling water
  • 1 egg, beaten, for the egg wash
  • 3 tablespoons everything bagel seasoning, or a mix of your own
  • Sesame seeds and poppy seeds, if building the topping yourself
  • Dried garlic and onion flakes, for that classic everything flavor
  • Flaky sea salt, to finish the topping

Instructions

  1. In a large bowl, dissolve the brown sugar in the warm water, then sprinkle in the yeast. Let it sit for 5 minutes until foamy, which tells you the yeast is alive.
  2. Add the bread flour and salt, and stir until a shaggy dough forms. Turn it out and knead for about 10 minutes until smooth, stiff, and elastic. This is a firm dough, so put some muscle into it.
  3. Place the dough in a lightly oiled bowl, cover, and let it rise in a warm spot for about 1 hour, until nearly doubled.
  4. Punch down the dough and divide it into 8 equal pieces. Roll each into a ball, then poke a hole through the center with your thumb and gently stretch it into a ring about 2 inches wide.
  5. Cover the shaped bagels and let them rest for 15 minutes. Meanwhile, bring a large pot of water to a boil and stir in the malt syrup or honey.
  6. Boil the bagels 2 or 3 at a time for 45 seconds per side. They will puff slightly. Lift them out with a slotted spoon and set them on a towel to drain.
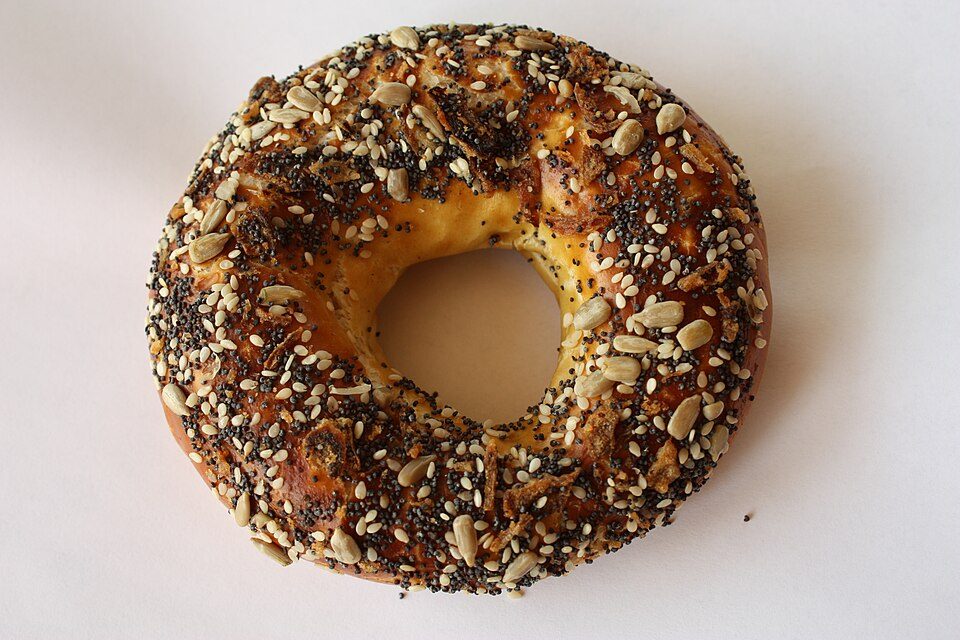
  7. Arrange the boiled bagels on a parchment lined sheet. Brush each with beaten egg and sprinkle generously with everything seasoning while the wash is still wet.
  8. Bake at 425°F for 20 to 25 minutes, until deep golden brown. Cool on a rack for at least 15 minutes before slicing.

Two Ways to Shape, and Which I Use

The poke-and-stretch in step 4 is the fast method. Roll a ball, drive your thumb through the middle, then spin the ring on both index fingers until the hole is about two inches across. It takes maybe fifteen seconds a bagel.

The rope-and-wrap method is the other one. Roll each piece into a rope about nine inches long, wrap it around the back of your hand so the ends overlap by an inch and a half in your palm, then roll the overlap against the counter to weld it shut.

Rope-and-wrap gives a more even ring and a slightly better crumb, because you are not tearing an existing gluten structure to make the hole. It also fails more often: a seam that opens in the water gives you a C rather than an O. I use poke-and-stretch on weekdays and rope-and-wrap when I care how they look.

Make the hole bigger than seems sensible either way. It closes up by roughly half between the rest, the boil, and the oven spring. A one inch hole becomes no hole at all.

The Cold Retard and What It Actually Buys You

Shape the bagels, put them on a floured tray, cover them, and refrigerate for 12 to 18 hours before boiling. This is the single change that moved my results closest to a proper deli bagel.

Yeast slows to a crawl at 4°C but enzymes keep working, breaking starch into sugars and proteins into amino acids. Those brown and produce flavour in the oven. An hour on the counter gives you bread flavour; overnight in the fridge gives you something deeper and faintly sour, and a crust that browns to mahogany rather than pale tan.

Cold dough is also easier to handle, holding its shape in the water instead of slumping. Boil straight from the fridge, no warming up, and add about five seconds a side.

The cost is fridge space. Eight bagels take a full half-sheet tray, and I have more than once rearranged every shelf to fit it in.

Inside the Boiling Pot

The boil gelatinises the starch on the outer few millimetres. That layer sets into a skin which limits how far the bagel can expand in the oven, keeping the crumb dense, and dries into the sheen you can spot across a room.

Barley malt syrup does two things in the water. It is high in maltose, a sugar that browns readily, so the crust colours faster and deeper. It also carries a malty flavour honey does not, which is the background note people recognise in a good bagel without being able to name it. Honey browns nearly as well but tastes floral. A tablespoon of either into roughly four litres.

Boil time is the dial you turn for texture:

Time per side Result
20 seconds Thin crust, lighter and puffier crumb, closer to a roll
45 seconds The standard. Firm chew, glossy crust, good rise
90 seconds Thick leathery crust, very dense, wrinkled skin

Keep a steady rolling boil and do no more than three at a time. Crowding drops the temperature, the bagels sit in hot-but-not-boiling water, and the skin never sets. Give them a minute on a clean tea towel afterwards, because water pooling underneath steams the base soggy on the tray.

Making the Topping Stay On

Seeds falling off in the toaster is the most common complaint I hear, and there are three separate causes.

The wash dried before the seeds went on. Egg wash sets in under a minute on a hot boiled bagel. Work one at a time: brush, top, move on. Not brush all eight, then top all eight.

Not enough pressure. Sprinkle generously over the wet top, then press it in with your palm. Gently, but actually press.

Or the seeds only went on top. The deli trick is to tip the seasoning into a wide shallow bowl and dunk the whole wet bagel face down, then twist. You get a thick even coat instead of a scattering, and far more of it holds. It uses nearly double the seasoning, but the leftovers keep in a jar for months.

The Last Ten Minutes in the Oven

425°F, middle rack, 20 to 25 minutes. Rotate the tray at 12 minutes because almost no home oven heats evenly front to back.

Colour is the guide, not the clock. Deep golden brown, darker than you would take a dinner roll, seeds toasted and fragrant. Underbaked bagels taste doughy and stale within hours. For certainty, the internal temperature should read 195 to 200°F.

Then leave them fifteen minutes minimum. Starch is still setting as they cool, and one cut open at four minutes turns gummy along the knife line. Same reason you cannot slice into a fresh sourdough loaf straight from the oven, however much you want to.

Storing Them Without Ruining the Crust

Day one they need no help. Day two, a paper bag on the counter, never plastic, because plastic traps the moisture escaping from the crumb and turns the crust soft and slightly clammy.

Beyond that, freeze. Slice them fully in half first, which sounds fussy until you try to saw a frozen one. Bag them, freeze up to three months, and drop the halves straight into the toaster from frozen on a medium setting. Thawing first makes them worse, not better.

Bagel Questions I Get Asked Most

Why did my bagels come out flat and wrinkled?

Almost always over-proofing. The gluten stretched past what it can support, so the bagel collapses in the water and comes out looking like a deflated tyre. Cut the counter rest to 15 minutes, or use the cold retard instead, where over-proofing is far harder to do.

My bagels floated the second they hit the water. Is that bad?

It means they are well proofed and full of gas. One that sinks and stays down is under-proofed. Sinking briefly then rising within about ten seconds is the sweet spot. Instant floating is a signal to shorten the rest next time.

Can I use active dry yeast instead of instant?

Yes, same quantity. This recipe already blooms the yeast in warm sugared water for five minutes, which is the step active dry needs anyway. Give the first rise an extra 15 minutes.

Do I really need barley malt syrup?

No. Honey or brown sugar in the water gives the shine and most of the browning. What you lose is the malty background note, a real difference but a subtle one. A jar lasts a year of weekend baking, so it is worth buying if you plan to make these more than twice.

Why is my crumb full of big holes?

Too much water, too long a first rise, or under-kneading, in that order of likelihood. Bagel crumb should be tight and even. Big irregular holes mean the dough behaved like a normal bread dough somewhere along the way.

Can I do this without a stand mixer?

Yes, and plenty of people prefer to. Ten minutes on a lightly floured counter with the heel of your hand and a scraper. If your arms give out, rest the dough five minutes and come back. The gluten carries on organising itself while it sits, which makes the second stretch noticeably easier.

If the boiling has put you off, the same dough logic in a more forgiving format is pretzel bites, which use a baking soda bath instead of malt water and take a third of the time. For a stiff-dough loaf with no pot at all, honey oat bread is where I send people who want the kneading practice.