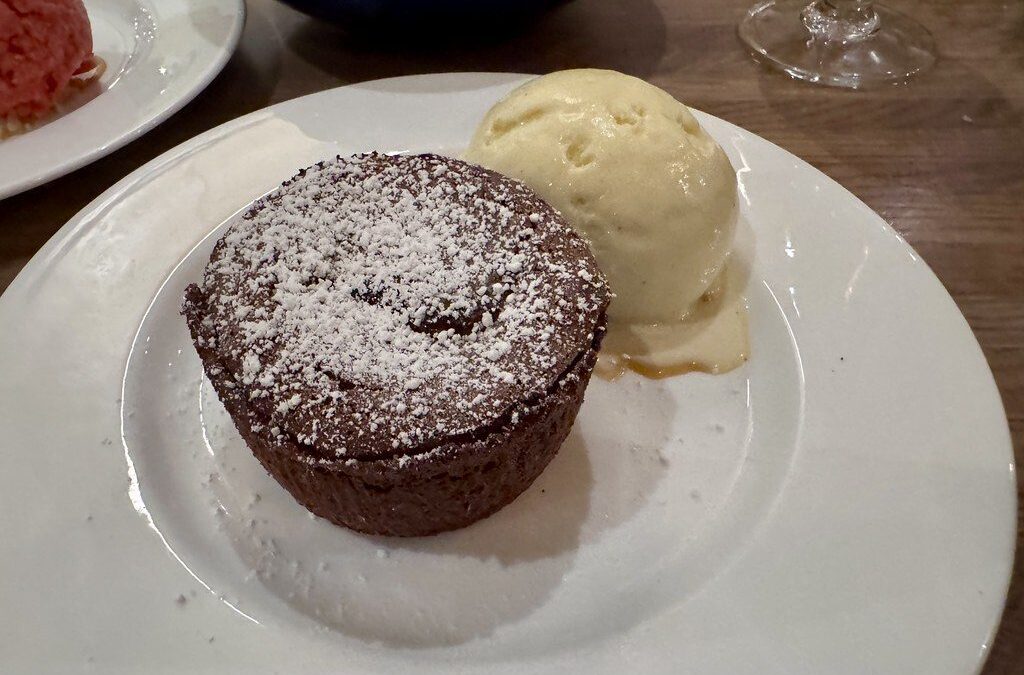
There is a reason molten chocolate lava cake has topped restaurant dessert menus for decades: cutting into that delicate cake and watching a river of warm chocolate spill onto the plate feels like a small piece of magic. The best news is that this show-stopping dessert is far easier to make at home than anyone expects, and it takes barely fifteen minutes of hands-on work.
The whole trick lives in the baking time. Pull these cakes at exactly the right moment and the edges set into a tender sponge while the center stays gloriously liquid. Master that window, which this recipe walks you through carefully, and you will have a dessert that tastes like it came from a fine-dining kitchen.
This one is for date nights, dinner parties, and any moment that deserves to feel a little celebratory.
Prep: 15 mins Cook: 12 mins Serves: 4
Why You’ll Love This Lava Cake
- That molten center that flows out warm and glossy the moment you break in.
- Just six core ingredients you likely already keep in the kitchen.
- Ready in under 30 minutes from mixing bowl to plated dessert.
- Make-ahead friendly so you can bake to order when guests arrive.
- Restaurant-worthy results that make you look like a pastry pro.
Ingredients
- 1/2 cup unsalted butter, plus extra for greasing
- 4 oz good-quality bittersweet or semisweet chocolate, chopped
- 2 large eggs, at room temperature
- 2 large egg yolks
- 1/4 cup granulated sugar
- Pinch of fine salt
- 1 teaspoon vanilla extract
- 2 tablespoons all-purpose flour
- Cocoa powder, for dusting the ramekins
- To serve: vanilla ice cream and fresh berries
Instructions
- Heat the oven to 425F (220C). Generously butter four 6-ounce ramekins, then dust them with cocoa powder, tapping out the excess. This coating is what lets the cakes release cleanly.
- Combine the butter and chopped chocolate in a heatproof bowl and melt gently, either over a pot of barely simmering water or in the microwave in 20-second bursts, stirring until glossy and smooth.
- In a separate bowl, whisk the whole eggs, egg yolks, sugar, and salt vigorously for about 2 minutes, until the mixture is pale, thick, and slightly foamy.
- Pour the warm (not hot) melted chocolate into the eggs in a steady stream, whisking constantly so the eggs do not scramble. Stir in the vanilla.
- Sift the flour over the top and fold it in gently with a spatula just until no streaks remain. The batter should be thick, silky, and shiny.
- Divide the batter evenly among the prepared ramekins, filling each about three-quarters full. Set them on a baking sheet for easy handling.
- Bake for 11 to 13 minutes. You are looking for firm, set edges and a top that is puffed but still soft and jiggly in the very center.
- Let the cakes rest for exactly one minute, no longer. Run a thin knife around each edge, invert a plate over the ramekin, and flip together confidently.
- Lift the ramekin away, dust with cocoa or powdered sugar, and add a scoop of ice cream. Serve at once while the center is still flowing.
Tips for the Best Lava Cake
- Use chocolate you would happily eat on its own; it is the dominant flavor, so quality shows.
- Watch the clock closely. Even one extra minute can set the center and cost you the lava.
- Butter and cocoa the ramekins thoroughly so the cakes slide out without sticking.
- Bake a test cake first if you are unsure of your oven, since every oven runs a little differently.
- Serve immediately; the molten center firms up as the cakes cool.
Variations & Substitutions
- Press a square of chocolate or a spoon of Nutella into the center of each before baking for an extra-gooey core.
- Add a pinch of espresso powder or a splash of orange liqueur to deepen the chocolate flavor.
- Use gluten-free flour blend in place of the all-purpose for a gluten-free version.
- Stir a little cayenne or cinnamon into the batter for a warm, spiced Mexican-chocolate twist.
How to Store & Reheat
Lava cakes are best fresh, but the batter stores beautifully. Fill the ramekins, cover them, and refrigerate for up to two days; simply add a minute or two to the bake time when cooking straight from cold. Already-baked cakes can be kept in the fridge for a day and gently rewarmed in the microwave for about 20 seconds, though the center will be more fudgy than flowing. For the true molten effect, bake to order.
What to Serve With It
A scoop of cold vanilla ice cream is the classic partner, the temperature contrast against the warm cake being the whole point. Fresh raspberries or a spoon of tart berry coulis cut through the richness, and a small pour of espresso or dessert wine turns it into a memorable finish.
Frequently Asked Questions
My cakes came out fully cooked with no lava. What went wrong?
They baked too long. Every oven varies, so start checking at 11 minutes and pull them the moment the edges are set but the center still jiggles.
Can I prepare these in advance for a dinner party?
Yes, and it is the best way to serve them. Fill the ramekins ahead, refrigerate, and bake straight from the fridge just before dessert, adding a minute or two to the time.
What if I do not have ramekins?
A well-greased muffin tin works in a pinch. Reduce the bake time slightly and run a knife around each cake carefully before turning them out.
Make these once and they will become your signature dessert for every special occasion.