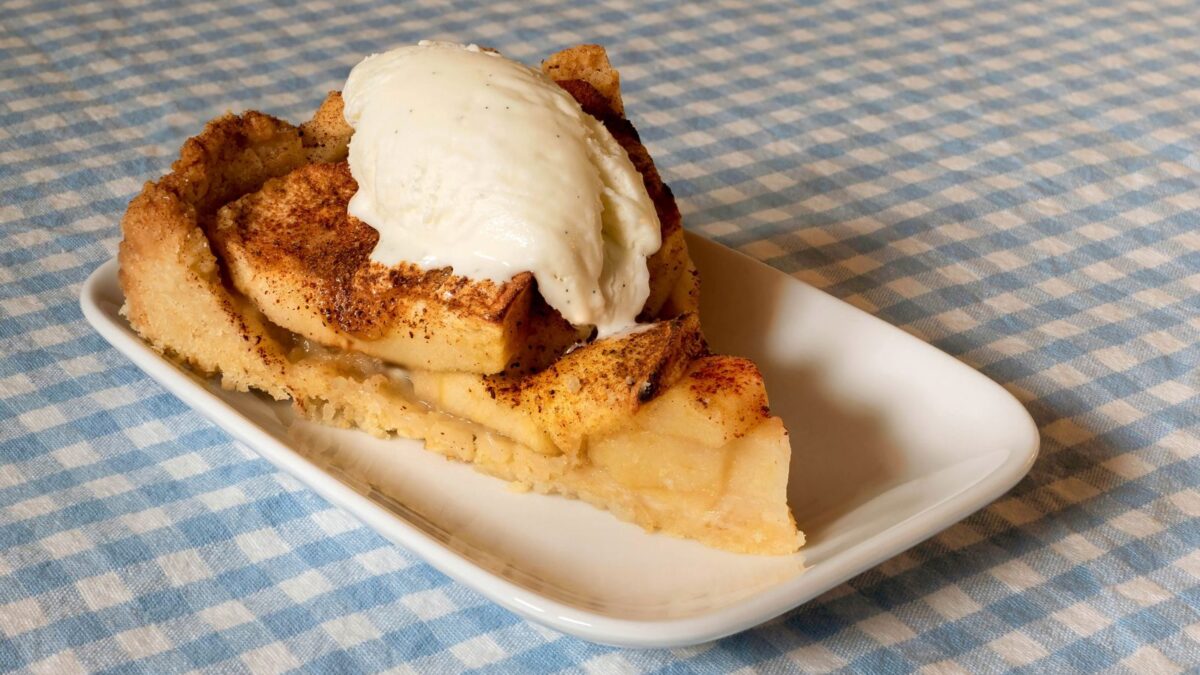
There are few smells that turn a house into a home quite like an apple pie baking in the oven. Warm cinnamon, buttery pastry, and softening fruit drift into every room, and suddenly everyone is hovering near the kitchen asking how long it will be.
This is the apple pie I make when I want something honest and unfussy. No stand mixer, no complicated lattice unless you feel like it, just a flaky crust and apples that stay tender without turning to mush. It is the kind of pie that looks like it took all day and really only takes a little patience.
If you have never made a pie from scratch, start here. The steps are forgiving, and even a slightly rustic pie tastes glorious with a scoop of vanilla ice cream melting over the top.
Prep: 40 mins Cook: 55 mins Serves: 8
Why You’ll Love This Apple Pie
- Flaky, buttery crust that shatters gently with every forkful rather than turning tough.
- Apples that hold their shape so you get real texture instead of a soupy filling.
- Balanced sweetness with just enough cinnamon and a whisper of lemon to keep it bright.
- Make-ahead friendly since the dough rests happily in the fridge overnight.
- A true crowd-pleaser that suits Sunday lunch, the holidays, or a quiet Tuesday treat.
Ingredients
- 2 and 1/2 cups all-purpose flour plus extra for rolling
- 1 teaspoon salt to season the pastry
- 1 tablespoon sugar for the dough
- 1 cup cold unsalted butter, cut into small cubes and kept very cold
- 6 to 8 tablespoons ice water, added gradually
- 3 pounds baking apples such as Granny Smith and Honeycrisp, peeled and sliced
- 3/4 cup granulated sugar, or a little less if your apples are sweet
- 2 tablespoons all-purpose flour to thicken the juices
- 1 and 1/2 teaspoons ground cinnamon plus a pinch of nutmeg
- 1 tablespoon lemon juice to keep the fruit bright
- 1 egg beaten, for the golden wash
- 1 tablespoon coarse sugar for sparkle on top
Instructions
- Make the dough. Whisk the flour, salt, and sugar together, then scatter in the cold butter cubes. Rub the butter into the flour with your fingertips or a pastry cutter until you have a coarse, pebbly mixture with some pea-sized pieces still visible. Those butter pockets create the flakiness.
- Add ice water one tablespoon at a time, tossing gently, until the dough just holds together when you squeeze a handful. Divide into two discs, wrap tightly, and chill for at least one hour or overnight.
- Prepare the filling. Toss the sliced apples with sugar, flour, cinnamon, nutmeg, and lemon juice. Let them sit for 10 minutes so the sugar begins to draw out a little juice.
- Roll the bottom crust. On a floured surface, roll one disc into a 12-inch circle. Drape it into a 9-inch pie dish and press gently into the corners, leaving the overhang for now.
- Fill the pie. Spoon in the apples, mounding them slightly in the center since they shrink as they bake. Leave most of the juices behind in the bowl so the bottom does not turn soggy.
- Add the top crust. Roll the second disc, lay it over the apples, and trim the edges to about an inch. Fold and crimp the edges to seal, then cut a few steam vents in the top with a sharp knife.
- Brush and chill. Brush the top with beaten egg and sprinkle with coarse sugar. Chill the assembled pie for 20 minutes while the oven heats to 425F, which helps the crust keep its shape.
- Bake. Place the pie on a baking sheet and bake at 425F for 20 minutes, then reduce to 375F and bake for another 35 to 40 minutes until the crust is deep golden and the filling bubbles at the vents.
- Cool completely. Let the pie rest at least 3 hours before slicing so the filling sets. This is the hardest but most important step for clean slices.
Tips for the Best Apple Pie
- Keep everything cold. Cold butter and cold water are what give you flaky pastry, so work quickly and chill when in doubt.
- Use a mix of apples. Tart Granny Smith and sweeter Honeycrisp together give the best flavor and texture.
- Bake on a preheated sheet pan to catch drips and encourage a crisp bottom crust.
- If the edges brown too fast, cover them loosely with foil for the last 20 minutes.
- Resist cutting early. A warm pie will run; a rested pie slices like a dream.
Variations & Substitutions
- Swap in a lattice top for a classic look, weaving strips over the filling before crimping.
- Add a handful of dried cranberries or raisins to the apples for extra chew and tang.
- Stir a tablespoon of bourbon or a splash of vanilla into the filling for warmth.
- Use a store-bought crust when time is short; the homemade filling still shines.
How to Store & Reheat
Apple pie keeps at room temperature, loosely covered, for up to two days, or in the fridge for up to five. Warm individual slices in a 350F oven for about 10 minutes to revive the crust. You can also freeze the whole baked pie, well wrapped, for up to three months; thaw overnight and reheat before serving.
What to Serve With It
A scoop of vanilla ice cream is the timeless partner, melting into the warm filling. A dollop of lightly whipped cream or a drizzle of salted caramel are both lovely too. For an afternoon slice, a strong cup of coffee or black tea balances the sweetness beautifully.
Frequently Asked Questions
Why is my bottom crust soggy?
Usually too much filling juice. Drain most of the liquid before filling, bake on a preheated sheet pan, and make sure your oven is fully up to temperature so the base sets quickly.
Can I make the dough ahead?
Absolutely. The dough discs keep in the fridge for up to three days or in the freezer for three months. Let frozen dough thaw in the fridge before rolling.
Which apples are best for pie?
Firm, tart varieties that hold their shape work best. Granny Smith, Honeycrisp, Braeburn, and Jonagold are all excellent, and a blend gives the most interesting flavor.
Bake it once and the smell alone will make it a regular in your kitchen. Cut a generous slice, add the ice cream, and enjoy every buttery, spiced bite.