Skip to content
Baking

Blueberry Scones

Blueberry Scones

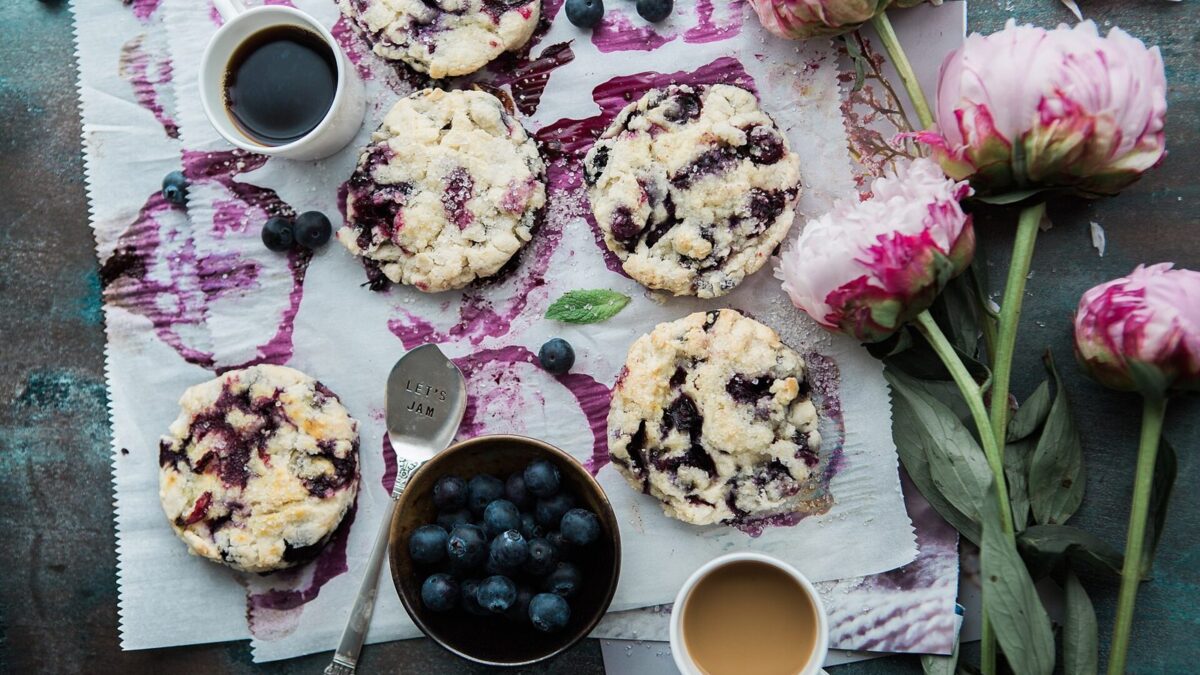
A good blueberry scone is tall, pale-gold, and comes apart in horizontal sheets when you pull it rather than crumbling into sand. The berries should have burst just enough to bleed a little purple into the crumb around them without turning the whole thing into a soggy patch. Everything below is aimed at those three outcomes.

This is the long version — the sweet-scone master guide. If something has already gone wrong for you and you want a diagnosis rather than a course, I wrote the cheddar herb scones post as a straight troubleshooting piece, and every fix in it applies to sweet scones too.

What the Cold Butter Is Actually Doing

Rubbing cold butter into flour leaves you with hundreds of flattened butter fragments coated in flour, sitting between layers of dough. In the oven, each one melts, its water content turns to steam, and that steam shoves the flour layers apart. That’s the flakiness. It isn’t a texture the flour produces on its own.

Which is why temperature is the whole game. Butter at 20C smears instead of staying in pieces, and smeared butter waterproofs the flour rather than separating it — short, sandy, biscuit-like. Perfectly edible. Not layered.

So: butter straight from the fridge, cubed to about 1cm. Fingertips only, not palms, lifting the mixture out of the bowl as you rub. If your kitchen is warm, freeze the cubes for 10 minutes first and run your wrists under the cold tap. That last one sounds fussy. It helps on a hot afternoon.

You’re aiming for coarse breadcrumbs with a few butter pieces still visible at pea size. Not uniform. The uneven bits are the ones that give you the biggest lift.

Box grater method, if you’d rather: freeze the butter for 30 minutes, grate it on the coarse holes straight into the flour, then toss with a fork. Takes 90 seconds and your hands never warm anything. I use this one more often than the rubbing method now.

Self-Raising Flour Plus Extra Baking Powder — Why Both

Self-raising flour in the UK carries roughly 1 to 1.5 teaspoons of raising agent per 150g. For 350g of flour that’s around 3 teaspoons, which is enough for a cake but not really enough for a 3cm-thick scone that needs to double in height in under 20 minutes.

The extra teaspoon takes the total to about 4, and that surplus is the vertical push and the split-open sides. Going further doesn’t help: past about 5 teaspoons you taste the metallic bitterness, and they rise fast then sink.

No self-raising flour? Use 350g plain flour, 4.5 teaspoons of baking powder and an extra pinch of salt. It works, and it’s what I do most of the time since I don’t keep two flours in a small kitchen.

Frozen Blueberries Beat Fresh, Most of the Time

This is the opinion I get argued with about. Frozen berries stay solid through the mixing, patting and cutting, so they don’t crush and streak the dough grey. Fresh ones, particularly big supermarket berries, burst constantly while you fold.

Add them straight from the freezer, unrinsed and unthawed, at the last possible moment. Thawing them first is the actual mistake people make — you get a purple, wet dough that never rises properly.

Fresh is better in one situation: small, firm, in-season berries, ideally wild or the little cultivated ones, which hold their shape and taste far more of blueberry. If you have those, use them, and fold with about six strokes.

Either way, toss the berries in a teaspoon of the flour before folding them in. It stops the outside going slick and helps them stay put rather than migrating to the bottom.

Milk, Cream or Buttermilk: What Each One Changes

The liquid does more than hydrate. It sets richness, tenderness and how the crust browns. Here’s what I’ve actually got out of each at 220C on the same 18-minute bake.

Liquid Amount What you get
Whole milk 175ml The reference version. Clean flavour, soft crumb, moderate golden top. Best all-rounder for blueberries because nothing competes with the fruit.
Double or heavy cream 160ml Richest and most tender, closest to an American coffee-shop scone. Use slightly less, since cream carries extra fat and less water. Browns fastest — check at 15 minutes.
Buttermilk 175ml plus 1/2 tsp baking soda Tangiest and softest. The acid needs the soda to work with, and that pairing gives a noticeably lighter, more open crumb. Slightly paler top.
Milk plus lemon juice 175ml plus 1 tbsp, rested 10 min Buttermilk stand-in. Works, but thinner. Hold back 15ml until you see how the dough comes together.

Whatever you use, it must be cold. Room-temperature liquid starts melting the butter you spent five minutes keeping solid.

Ingredients

  • 350g self-raising flour – plus a little extra for dusting.
  • 1 tsp baking powder – for extra lift and height.
  • 85g cold unsalted butter – cubed, straight from the fridge.
  • 3 tbsp caster sugar – lightly sweet, not cloying.
  • 1 pinch of salt – to balance the sweetness.
  • 150g fresh blueberries – or frozen, added straight from the freezer.
  • 175ml cold milk – whole milk gives the richest result.
  • 1 tsp vanilla extract – for a warm, rounded flavour.
  • 1 squeeze lemon zest – optional, but it lifts the berries beautifully.
  • 1 egg, beaten – for glazing the tops.

Instructions

  1. Preheat your oven to 220C (200C fan) and line a baking tray with baking paper. A hot oven is essential for a good rise.
  2. Put the flour, baking powder and salt into a large bowl. Add the cold cubed butter and rub it in with your fingertips until the mixture resembles fine breadcrumbs. Work quickly to keep the butter cold.
  3. Stir in the caster sugar and the lemon zest, if using. Then gently fold through the blueberries, trying not to crush them.
  4. Make a well in the centre. Mix the cold milk with the vanilla, then pour most of it in. Using a cutlery knife, stir in a cutting motion until the dough just comes together, adding the last of the milk only if needed. It should be soft but not sticky.
  5. Tip the dough onto a lightly floured surface and bring it together with your hands. Do not knead it. Gently pat it out to about 3cm thick – keeping it thick is what gives you tall scones.
  6. Dip a 6cm round cutter in flour and stamp out your scones, pressing straight down without twisting. Twisting seals the edges and stops them rising evenly. Gather the offcuts, pat out again, and cut the rest.
  7. Place the scones on the tray, spaced slightly apart. Brush the tops with beaten egg, taking care not to let it drip down the sides, which can hinder the rise.
  8. Bake for 18 to 20 minutes until well risen and golden on top. Transfer to a wire rack and leave to cool for a few minutes before serving warm.

Patting, Cutting, and the Twist That Costs You 5mm

Three centimetres. Not two. This is the commonest reason home scones come out looking like biscuits — people pat thinner than they think. Put a ruler next to it once and you’ll recalibrate permanently. I did, after years at about 2cm.

Press the cutter straight down and lift it straight up. Twisting drags the cut edge sideways and pinches the layers shut, and a sealed edge can’t split open, so the scone rises lopsided or barely at all. The difference is small but visible: maybe 5mm of height and a much messier side profile.

The offcuts will never be as good as the first cut, because that dough has been handled twice. Pat them, don’t re-knead them, and accept that scone number seven is the cook’s scone.

Spacing is a real choice. About 2cm apart and the sides stay soft where they nearly touch; 5cm apart and every side crisps. I go close, because a soft side splits more easily by hand.

No cutter? Pat into a 20cm round, 3cm thick, and cut 8 wedges with a floured knife in single decisive strokes. Same bake time, no offcuts.

Freezing Them Raw Is the Real Trick

Cut scones freeze better unbaked than baked, and this changed how often I make them. Stamp them out, arrange them on a tray so they aren’t touching, freeze until solid — about 90 minutes — then bag them.

Bake straight from frozen at the same 220C, no thawing, adding 4 to 6 minutes. Glaze them just before they go in, not before freezing. They rise as well as fresh, sometimes better, because the butter is properly cold when it hits the heat.

They keep 3 months. Two scones on a Sunday with no mixing bowl beats a batch of twelve, which is why I stopped baking them all at once. Already-baked ones freeze fine for a month but need 5 minutes at 180C to revive, not the microwave, which turns the crust rubbery.

Glaze Options, and Whether You Need One

The beaten egg wash gives you the deep, shiny golden top most people picture. Brush it on the tops only. Egg that runs down the sides sets into a glue that welds the layers shut, and you’ll see it in a stunted rise.

Milk gives a softer, matte, paler finish, the traditional teatime look. Cream sits between the two. None affects the inside.

A sweet drizzle after baking is a different decision. Whisk 80g icing sugar with 2 to 3 teaspoons of lemon juice into a thick pourable glaze and spoon it over once the scones have cooled for at least 20 minutes, or it just soaks in and disappears. With blueberries, the lemon version beats a plain vanilla one comfortably — the acid sharpens fruit that can otherwise taste flat and jammy. The same choice between a thin drizzle and a thicker cold-set glaze comes up in a lemon poppy seed loaf.

Coarse demerara sugar scattered over the egg wash before baking is the option I use most. Crunch, no extra step, no waiting for anything to cool.

Where a Sweet Scone Differs From a Savoury One

Sugar browns. Three tablespoons doesn’t sound like much, but it’s enough that a sweet scone hits deep gold two or three minutes earlier than a cheese-and-herb one at the same oven setting. Start checking at 16 minutes rather than 18 if your oven runs hot.

Fruit brings water, and water is the enemy of a crisp base. Damp bottoms every time? Move the tray up one shelf and add 2 minutes.

Savoury scones tolerate a wetter dough because cheese firms up as it cools. A sweet blueberry dough that’s too wet spreads sideways instead of climbing. If your dough is sticking to your fingers rather than just tacky, you overshot the milk — pat in a scant tablespoon of extra flour and move on, don’t work it in properly.

Serving, and What Else Uses This Method

Warm, split by hand, salted butter melting in. Clotted cream and jam belong on a plain scone, in my opinion; with blueberries already in the dough, jam is one sweet thing too many. Same day is genuinely best. Day two they’re dry enough that toasting the cut face isn’t optional.

If cold-fat baking is the part you enjoy, buttermilk biscuits run on the identical principle with a folding step that stacks the layers deliberately. For no-fat-rubbing at all and a loaf in under an hour, Irish soda bread is the one. And if you want blueberries in something more forgiving on a weekday, blueberry streusel muffins take no cutting and no chilling.

Questions I Get Asked About Scones

Why did mine spread out flat instead of rising?

Almost always dough that was too wet or butter that had gone soft. Both cause the same sideways slump. Chill the cut scones on the tray for 15 minutes before baking — that alone rescues most flat batches, and costs you nothing.

Can I make the dough the night before?

Cut them, cover the tray, and refrigerate for up to 12 hours. Beyond that the baking powder loses its punch in contact with the wet dough and you lose height. If you need longer than a night, freeze them instead.

My blueberries all sank. What went wrong?

Too wet a dough, or berries added before the sugar and folded too long. Flour-coat the berries, add them last, and stop folding at about six strokes even if the distribution looks uneven. It evens out during the patting.

Can I use other frozen berries?

Raspberries break up badly, so chop them frozen and expect streaks. Cherries need halving and patting dry. Blackberries work almost as well. Anything wetter than a blueberry needs the tray a shelf higher.

What’s the right size of cutter?

A 6cm cutter with 3cm-thick dough gives you around 8 to 10 scones and a nice tall shape. A 5cm cutter makes taller-looking smaller scones that bake in 15 to 16 minutes. Anything wider than 7cm and they read as flat no matter how thick the dough was.

Do I need to sift the flour?

No, but whisk the flour, baking powder and salt together for 15 seconds. Unevenly distributed baking powder is what produces one scone that towers and one that sulks in the same batch.