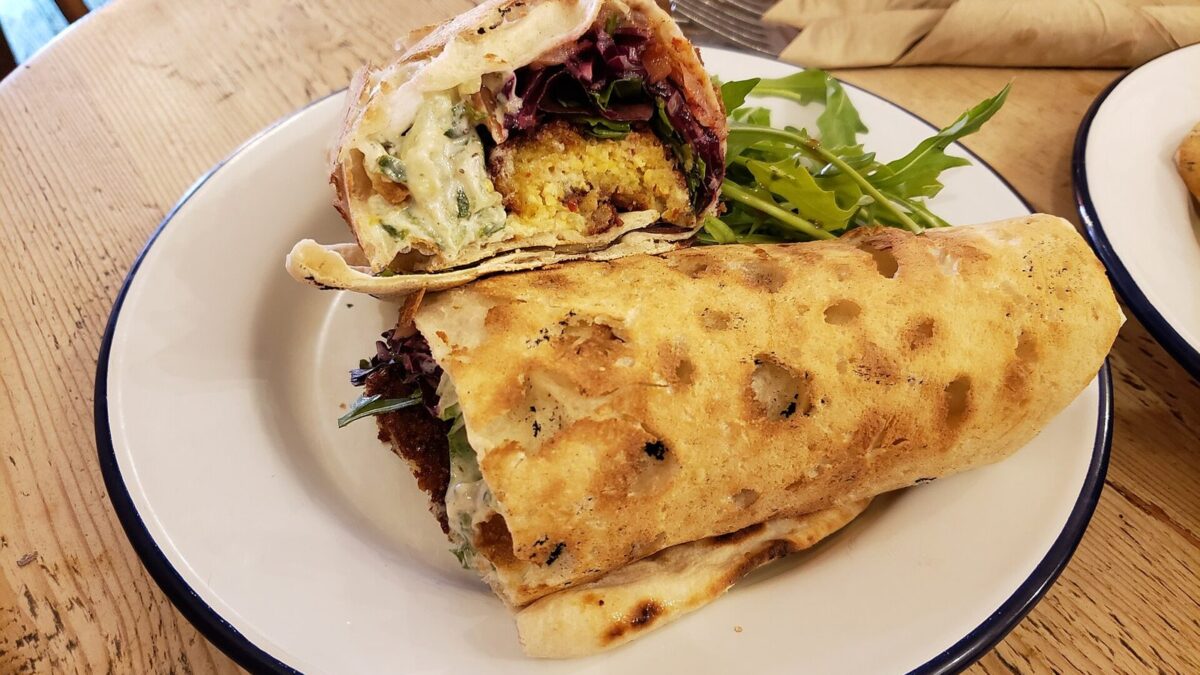
Two decisions determine whether your falafel is good: what chickpea you start from, and how you apply heat. One of those is genuinely close. The other really isn’t.
I’ve made this six or seven different ways over the last couple of years, including a tinned-chickpea batch that I only attempted because a reader insisted it could be done. It could not. Here’s the honest comparison, failures included.
Dried and soaked versus tinned: this comparison has a loser
Soaked dried chickpeas are raw. They’ve absorbed water but no heat, so their starch hasn’t gelatinised and their cell walls are still intact. Blitz them and you get a coarse, sandy mixture of broken-but-firm particles that grip each other by friction. Drop that in hot oil and the outside dehydrates and sets into a craggy shell within about 30 seconds, while the inside cooks through as the trapped water turns to steam.
Tinned chickpeas have been pressure-cooked in the can. The starch is fully gelatinised and the cells are soft and waterlogged — a tin is typically well over half water by weight. Blitz them and you get paste, not grains. That paste has nothing to hold onto and far too much moisture to lose, so when it hits 175°C oil the water inside converts to steam faster than a crust can form. The patty inflates slightly and then bursts.
My attempt: 400g tin, drained and dried on paper for 20 minutes, three tablespoons of flour worked in, chilled for an hour. The test patty broke apart within 45 seconds and the pan turned into a slick of chickpea sediment. I added another two tablespoons of flour to the remaining mix and shallow-fried it, which held together but produced something closer to a bland veggie burger — dense, uniform inside, no crunch worth the name.
If tinned is all you have, bake or air-fry them and call them chickpea patties. They’re perfectly decent as that. They are not falafel, and no amount of binder makes them one.
Fried, baked, air-fried: what you actually get from each
All three work with soaked dried chickpeas. They give you three different foods.
| Method | Time | Crust | Interior | Oil used |
|---|---|---|---|---|
| Shallow-fried, 2cm oil at 175°C | 3–4 min per side | Craggy, properly shattering | Steamy, green, light | ~500ml (most reusable) |
| Oven-baked, 200°C fan | 25 min, turned once | Dry and firm, no shatter | Denser, slightly crumbly | 2 tbsp brushed on |
| Air-fried, 190°C | 14–16 min, shaken twice | Even, crisp, a bit uniform | Drier than fried, better than baked | 1 tbsp sprayed |
The frying pan wins on texture and it isn’t close. That craggy surface comes from the rough exterior of the coarse mixture being hit by hot oil on all sides at once, and the irregularity is what makes it shatter rather than crack. Oven heat is dry air, which is a far less efficient conductor, so the surface dries slowly and hardens instead of frying. You get crisp. You don’t get crackly.
Air frying sits closer to frying than I expected. It’s a small fan oven running fast, so the moving hot air pulls surface moisture off much quicker than a conventional oven, and at 190°C with a spray of oil you get a genuinely crisp shell. What’s missing is the unevenness — everything comes out a uniform tan, and the flat sides that touched the basket stay flat. My family couldn’t tell air-fried from fried once it was inside a wrap with tahini and pickles. On a plate, side by side, everyone could.
Baked is the weakest, and I’d only make it that way if I were cooking 40 of them for a crowd, where the tray capacity outweighs the texture loss.
Prep: 20 mins, plus 12 hours soaking Cook: 15 mins Serves: 4
Ingredients
- 250g dried chickpeas — soaked 12 hours in cold water, drained, never tinned
- 1 small onion, roughly chopped
- 4 garlic cloves, peeled
- 1 large handful fresh parsley, stalks included
- 1 large handful fresh coriander
- 2 teaspoons ground cumin
- 1 teaspoon ground coriander
- 1 teaspoon baking powder — added at the last moment
- 2 tablespoons plain flour — or chickpea flour for a gluten-free batch
- 1 teaspoon salt
- Sunflower or vegetable oil — about 500ml for shallow frying
- 4 large flatbreads, warmed
- Tahini sauce, shredded lettuce, sliced tomato and pickles, to serve
Instructions
- The night before, cover the dried chickpeas with at least twice their depth of cold water. They’ll roughly double, ending up around 500g. Soak 12 hours, drain well, and spread on a tea towel for 10 minutes to dry the surface.
- Put the chickpeas, onion, garlic, parsley and coriander in a food processor. Pulse in short bursts, scraping down twice, until the mixture looks like coarse wet sand — you should still see individual chickpea fragments about the size of couscous. Squeeze a handful: it should hold its shape. Do not run the motor continuously; a smooth paste fries gummy.
- Add the cumin, ground coriander, salt and flour. Pulse three or four more times. Tip into a bowl, cover, and chill 30 minutes.
- Stir the baking powder through just before shaping. With damp hands, form walnut-sized balls and flatten them slightly, about 4cm across and 2cm thick. You’ll get 16 to 20.
- Pour oil into a deep frying pan to a depth of 2cm and heat to 175°C. Without a thermometer: a cube of bread should turn golden in about 45 seconds.
- Test-fry one patty first. If it breaks up, pulse another tablespoon of flour into the mix. If it holds, fry the rest in batches of five or six, 3 to 4 minutes per side, until deep brown and firm to a spoon-tap.
- Drain on kitchen paper and salt them while hot.
- Warm the flatbreads, spread with tahini, layer in lettuce, tomato and pickles, add four falafel, drizzle with more tahini, and roll tightly. Eat immediately.
My pick, and the two nights I break it
Shallow-fried, from dried chickpeas soaked overnight. It’s the only combination that produces the crust the dish is actually about, and 2cm of oil in a pan is a smaller commitment than deep-frying — strained through a sieve into a jar, mine gets three or four more uses before it starts smelling tired.
I break it twice. When I’m cooking for more than six people I bake, because a single tray does 20 patties and juggling batches in a frying pan while a room full of guests waits is genuinely miserable. And on a weeknight when I’ve remembered to soak chickpeas but not to plan an evening, I air-fry, because 15 minutes hands-off beats 15 minutes standing at the hob turning things.
One correction to what I’d written here before: I’d said to heat the oil to “roughly 170°C” over a medium flame. That’s a shade too cool. At 170 the patties spend longer in the oil before the crust sets and they absorb noticeably more of it — greasy rather than crisp. 175 to 180°C is the window, and the practical version is to let one patty tell you: it should sizzle sharply and rise to the surface within about five seconds, not sit sullenly on the bottom.
Freeze the shaped raw patties on a tray and bag them once solid. They fry straight from frozen with an extra 90 seconds a side, and I keep a bag going more or less permanently.
The obvious companions are already here: hummus uses cooked chickpeas where this uses raw ones, which is a useful contrast to hold in your head, and baba ganoush gives the wrap a smokier sauce than tahini alone. If you’d rather eat the same flavours off a plate with a fork, the roasted red pepper and chickpea bowl is the bowl version, and a three bean salad alongside makes it a proper lunch without turning the hob on twice.