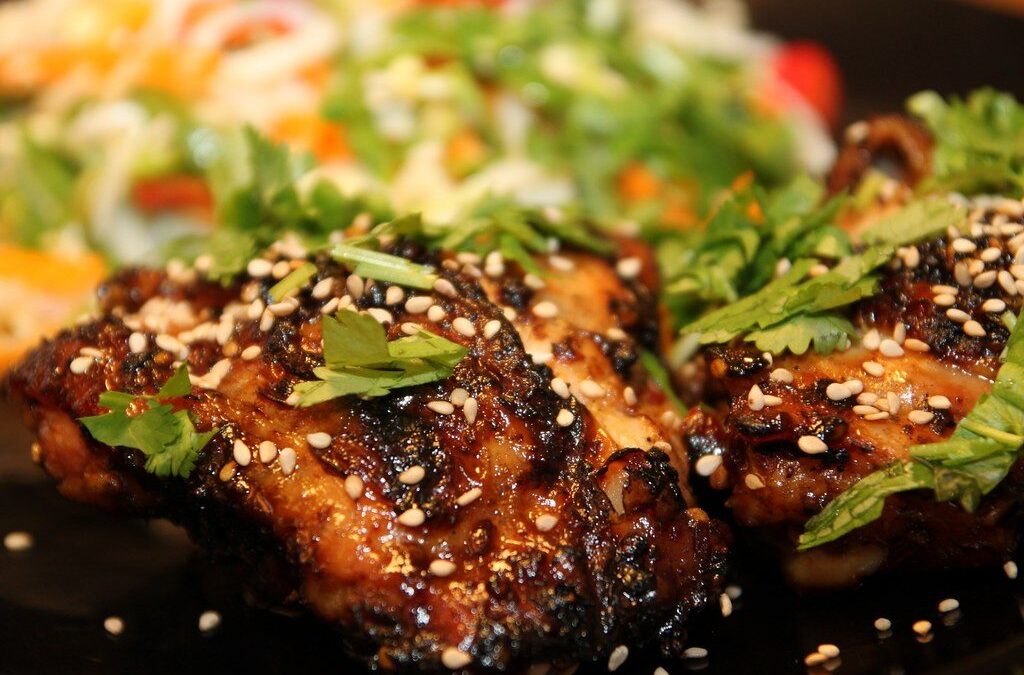
Some nights you just need dinner on the table fast, without resorting to a phone and a delivery app. These teriyaki chicken bowls are my answer. In about twenty minutes you get tender, caramelized chicken coated in a sticky, glossy sauce, piled over rice with a few crisp vegetables. It tastes like takeout, but fresher and better.
The homemade teriyaki sauce is the real hero, and it could not be simpler: a few pantry staples simmered until glossy and thick. Once you see how easy it is to make from scratch, you will never miss the bottled stuff, which is usually loaded with extra sugar and additives anyway.
This is a recipe for busy weeknights, lazy Sundays, and anyone learning to cook who wants a reliable win. It is endlessly customizable, kid-friendly, and the leftovers make an excellent next-day lunch. Consider it your new go-to when the fridge feels empty and time is short.
Prep: 10 mins Cook: 10 mins Serves: 4
Why You’ll Love These Teriyaki Bowls
- Faster than takeout: Start to finish in about twenty minutes, no waiting for delivery.
- Homemade sauce: A glossy, better-for-you teriyaki from ingredients you already have.
- One pan for the chicken: Everything for the protein happens in a single skillet.
- Totally customizable: Swap the vegetables, protein, or grain based on what you have.
- Meal-prep friendly: The components keep and reheat beautifully for easy lunches.
Ingredients
- 1 1/2 lbs boneless chicken thighs — cut into bite-sized pieces, thighs stay juicy
- 1 tablespoon neutral oil — for searing
- 1/3 cup soy sauce — low-sodium recommended for balance
- 3 tablespoons honey — or brown sugar, for that sticky glaze
- 2 tablespoons rice vinegar — adds brightness
- 2 cloves garlic — minced
- 1 teaspoon fresh ginger — grated
- 1 teaspoon cornstarch — mixed with 1 tablespoon water to thicken
- 2 cups cooked rice — white or brown, for serving
- 1 cup broccoli florets — steamed until tender-crisp
- Sesame seeds and sliced scallions — to garnish
Instructions
- Mix the sauce. In a small bowl, whisk together the soy sauce, honey, rice vinegar, garlic, and ginger. Set it near the stove so it is ready to go. Stir the cornstarch and water together in a separate small cup.
- Sear the chicken. Heat the oil in a large skillet over medium-high until shimmering. Add the chicken pieces in a single layer and let them sit undisturbed for 2 to 3 minutes to develop a golden crust before stirring.
- Cook through. Continue cooking, stirring occasionally, for another 3 to 4 minutes until the chicken is browned on all sides and nearly cooked through.
- Add the sauce. Pour the teriyaki mixture into the skillet. It will bubble up immediately; stir to coat the chicken and let it simmer for a minute.
- Thicken the glaze. Give the cornstarch slurry a quick stir and pour it in. Cook for another minute, stirring, until the sauce turns glossy and clings to the chicken. This is what gives it that signature sticky finish.
- Steam the broccoli. While the chicken cooks, steam or microwave the broccoli until bright green and tender-crisp, about 3 minutes.
- Build the bowls. Divide the rice among four bowls, top with the glazed chicken and any extra sauce, and add the broccoli alongside.
- Garnish and serve. Finish with a sprinkle of sesame seeds and sliced scallions for crunch and color.
Tips for the Best Teriyaki Bowls
- Do not crowd the pan: Give the chicken space so it sears and browns instead of steaming.
- Use thighs for juiciness: They stay tender even if slightly overcooked, unlike breast meat.
- Adjust the sauce to taste: Add more honey for sweeter, more vinegar for tangier.
- Have everything ready first: This cooks fast, so prep the sauce and slurry before you start.
- Let the glaze thicken fully: A proper sticky coating clings to the chicken rather than pooling at the bottom.
Variations & Substitutions
- Different protein: Swap in salmon, shrimp, tofu, or thinly sliced beef; adjust cooking time accordingly.
- More vegetables: Add snap peas, bell peppers, carrots, or edamame for extra color and nutrition.
- Grain swap: Serve over quinoa, cauliflower rice, or soba noodles instead of rice.
- Gluten-free: Use tamari or a certified gluten-free soy sauce in place of regular soy.
How to Store & Reheat
Store the chicken and rice in separate airtight containers in the fridge for up to 4 days, which makes this ideal for meal prep. Reheat the chicken in a skillet with a splash of water to loosen the glaze, or microwave in short bursts. The sauce thickens as it cools, so a little added water brings it back to a glossy consistency. I do not recommend freezing, as the texture of the rice suffers.
What to Serve With It
These bowls are a complete meal on their own, but a side of quick cucumber salad dressed with rice vinegar adds a refreshing crunch. A bowl of miso soup rounds things out for a fuller spread. For extra vegetables, a pile of steamed edamame with flaky salt is always welcome.
Frequently Asked Questions
Can I use chicken breast instead of thighs?
Yes, though breast can dry out more easily. Cut it into even pieces and watch it closely, pulling it off the heat as soon as it is cooked through.
Is homemade teriyaki sauce really better?
It is fresher, less sweet, and free of the preservatives in many bottled versions. You also control the flavor exactly, adjusting the sweet and tangy balance to your taste.
Can I make this ahead for the week?
Absolutely. Cook a batch and portion the chicken and rice into containers. It reheats well and stays good in the fridge for up to four days.
Keep this one in your back pocket for the busiest nights; it delivers every single time. Enjoy.