A pizzeria deck oven runs at 430 to 480C. Your oven, on its very best day with the dial all the way round, gets to 250C. That single gap explains almost every disappointing home pizza: at 480C a pizza is finished in 90 seconds, before any moisture has time to soak downward, and at 250C it needs ten to fifteen minutes, which is ten to fifteen minutes for sauce and cheese water to work their way into the dough.
You cannot close that gap. You can work around it, and the workarounds are what this post is about. Everything below is aimed at one goal: get more heat into the bottom of the base, faster, and put less water on top of it.
Prep: 25 mins active, plus 24-48 hours cold ferment Cook: 8-12 mins Serves: 2-3
Where the heat actually has to come from
Air is a poor conductor. The 250C air in your oven browns the top of the pizza reasonably well but does almost nothing for the underside. What cooks the base is conduction from whatever the dough is sitting on, and that surface needs to be both hot and heavy enough to stay hot when a cold, wet disc of dough lands on it.
A thin baking sheet has almost no thermal mass. It dumps its heat into the dough in the first ten seconds and then sits there at whatever the air temperature is. That is the pale, bendy base most of us started with.
Steel, stone, or the tray you already own
A 6mm baking steel is the biggest single upgrade I have made to my kitchen, and I resisted buying one for two years because it seemed silly. Steel conducts roughly fifteen to twenty times better than cordierite stone, which in practice means the base sets and blisters in the first minute instead of the first four.
Stone still works and is cheaper and lighter. It just wants a longer preheat and gives you a slightly softer, breadier bottom.
Whichever you use, preheat it for 45 to 60 minutes on the highest oven setting, positioned on a shelf about 20cm below the grill element. Not 15 minutes. The oven beeps when the air hits temperature, and a 6mm slab of steel is nowhere near thermally equalised at that point. I have tested this the lazy way and the difference between a 15-minute and a 50-minute preheat is a base you can fold and a base that holds its own point.
No steel or stone? Turn a heavy baking tray upside down and preheat that for 40 minutes. It gets you perhaps 60 per cent of the way there.
I went further into oven ceilings and stone choice in the margherita troubleshooting post, so if the base is your main enemy, start there. This one is about what changes once you add pepperoni and its grease.
Hydration, and why I stopped at 63 per cent
Hydration is the weight of water as a percentage of the weight of flour. The 320g flour and 200ml water below works out at 62.5 per cent, and that is deliberate.
Wetter doughs, 70 per cent and up, give a more open, blistered crumb and are what Neapolitan pizzerias run. They are also slack, sticky, and genuinely hard to launch off a peel without folding in on themselves. I made a 72 per cent dough three times and landed two of them as calzones by accident.
At 62 to 65 per cent the dough is workable with floury hands, holds a round while you stretch it, and still puffs properly at the rim. If you want a touch more openness, add 10ml of water and no more. Go the other way, below 58 per cent, and you get a crackery, dense base that tastes like a supermarket thin-and-crispy.
Bread flour matters here too. The 12 to 13 per cent protein builds the gluten that traps gas at the rim. Plain flour will make a pizza, but a flatter, shorter one.
Cold ferment: the free upgrade
Same flour, same water, same yeast. Ferment it two hours on the counter and you get a pizza that tastes of bread. Ferment it 48 hours in the fridge at around 4C and you get one that tastes of something.
The mechanism is not complicated. Cold slows yeast activity down hard, but enzymes in the flour keep breaking starch into simpler sugars and protein into amino acids the whole time. Those are the compounds that brown and taste of something at the end. A fast warm rise inflates the dough before any of that chemistry has happened.
My routine: mix and knead in the evening, one hour on the counter until it starts to move, then divide into two 260g balls, oil them lightly, and into separate lidded containers in the fridge. Best window is 24 to 72 hours. Past about four days mine start smelling sharply of alcohol and the gluten goes slack. On a night with nothing in the fridge, two-ingredient yogurt flatbreads skip proving altogether, and they do give something up for it.
Take the balls out 2 hours before baking. Cold dough will not stretch; it snaps back at you every time and you end up fighting it thinner in the middle than at the edge.
Why cup-and-char pepperoni curls and yours does not
This is the question I get most and the answer is in the casing, not the meat.
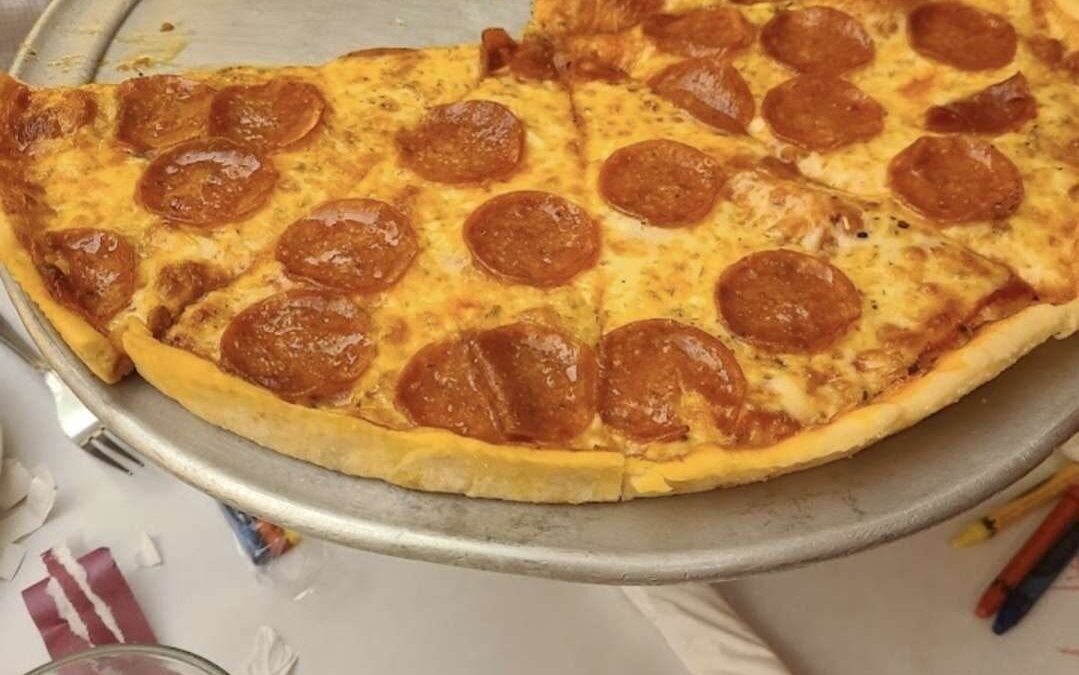
Cup-and-char pepperoni is stuffed into a natural casing, which shrinks in the oven. It shrinks unevenly, more at the edges than the centre, so each slice pulls up into a little bowl and the rim crisps into a dark ring while the centre catches a pool of rendered orange fat. That is the pepperoni people go looking for.
Most supermarket pepperoni, especially the pre-sliced packs and anything labelled for sandwiches, is made in a fibrous or collagen casing that is peeled off before slicing. Nothing shrinks. It lies flat, browns evenly, and renders its fat straight out onto the cheese. It tastes fine. It just will not cup.
Two other factors. Diameter: smaller slices, around 3cm, cup much more readily than 6cm ones. And thickness: about 2mm is the sweet spot. Paper-thin slices dry out and go brittle before they curl.
If your shop only carries the flat kind, buy a stick of natural-casing pepperoni and slice it yourself. Ask at a deli counter for pepperoni in a natural casing, cut around 2mm.
The grease problem nobody warns you about
Pepperoni renders a lot of fat. On a heavily loaded pizza you can end up with orange puddles that make the surface of the cheese slide off in one sheet when you cut it.
Three things help, and I use all three. Keep pepperoni to 80 to 100g on a 30cm pizza, which is more than it sounds when the slices overlap slightly rather than tile edge to edge. Put roughly a third of the slices under the cheese and the rest on top, so some of the fat renders into the cheese instead of on it. And blot the finished pizza with a folded paper towel for two seconds before slicing, which is inelegant and works.
Low-moisture mozzarella versus the fresh ball
Fresh mozzarella packed in water is around 55 to 60 per cent water. Low-moisture is closer to 45 per cent. On a 90-second Neapolitan bake that difference barely registers. Over a 10-minute home bake, that extra water has time to leave the cheese, pool on the sauce, and steam the dough from above.
So: low-moisture mozzarella for a home pepperoni pizza, in a block you grate yourself. Pre-grated bags carry potato starch or cellulose as an anti-caking agent, and it makes the melt slightly grainy and matte rather than glossy.
If you only have a fresh ball, tear it, sit it on paper towels for 30 minutes, and use less than you think. A spoonful of grated parmesan or a little provolone added to the mozzarella gives back the savoury depth you lose by skipping the fresh cheese.
Ingredients
- 320g / 2.5 cups bread flour, 12-13% protein, plus extra for dusting
- 1 teaspoon instant yeast
- 1 teaspoon salt
- 1 teaspoon sugar
- 200ml / 3/4 cup warm water (about 62% hydration)
- 1 tablespoon olive oil, plus more for the containers
- 150ml / 2/3 cup passata or good tinned tomatoes, crushed by hand
- 1 clove garlic, finely grated
- 1 teaspoon dried oregano
- 200g / 2 cups low-moisture mozzarella, grated from a block
- 80-100g pepperoni, natural casing if you can get it, sliced about 2mm
- A pinch of salt and a drizzle of olive oil, for the sauce
Instructions
- Mix the dough. Combine flour, yeast, salt and sugar in a bowl, add the warm water and olive oil, and stir to a shaggy mass. Rest it 15 minutes before kneading; the flour hydrates and the kneading gets much easier.
- Knead 8 to 10 minutes until the surface is smooth and a poked dent springs most of the way back.
- One hour at room temperature, covered, until it has visibly loosened but not doubled.
- Divide and chill. Cut into two balls of about 260g, oil lightly, and refrigerate in separate lidded containers for 24 to 48 hours.
- Two hours before baking, take the dough out and leave it covered at room temperature. Meanwhile mix the sauce: passata, grated garlic, oregano, a pinch of salt and a drizzle of oil. It does not get cooked. It cooks on the pizza, and cooking it twice is what makes home pizza sauce taste flat and jammy.
- Preheat for 45 to 60 minutes with the steel or stone in place, oven at maximum, around 250C / 480F.
- Stretch by hand on a floured sheet of parchment. Press from the centre outward with your fingertips, leaving the outer 2cm untouched, then lift and let gravity pull it to about 30cm. No rolling pin: it flattens the gas out of the rim.
- Top lightly. Four to five tablespoons of sauce spread thin, a third of the pepperoni, the cheese, then the remaining pepperoni on top. Leave a 2cm border bare.
- Bake 8 to 12 minutes on the parchment, or slide it off after 3 minutes for a crisper bottom. It is ready when the rim has dark blistered spots, the cheese is bubbling, and the pepperoni edges have darkened.
- Blot, rest 2 minutes, slice. Cutting straight from the oven drags the cheese with the wheel.
Reading the underside before you commit to the next one
Lift a slice and look at the bottom. It tells you more than the top does.
Evenly pale with no dark spots at all means the surface was not hot enough or not preheated long enough. Dark, almost black patches with pale gaps between them is normal and good, that is contact browning. Uniformly dark brown edge to edge means it sat too long, and next time pull it a minute or two earlier or move the shelf up.
A soggy circle in the middle with a crisp rim is a topping problem, not a heat problem. Less sauce, drier cheese.
The reheat that keeps the base crisp
Dry skillet, medium heat, lid on, three to four minutes. The base re-crisps against the pan while the trapped steam melts the cheese. A few drops of water flicked into the pan under the lid speeds the cheese up if the slice is thick.
The oven at 200C for 6 minutes is second-best. The microwave turns the crust to leather in under a minute and there is no rescuing it.
And if you have leftover dough balls, do not throw them out. They make a fine pan of rosemary focaccia with an extra hour of proving, or flatten into rounds for cheesy garlic bread. A sharp caesar salad alongside is the thing I put on the table with pepperoni pizza most weeks, because the anchovy and lemon cut straight through the fat.