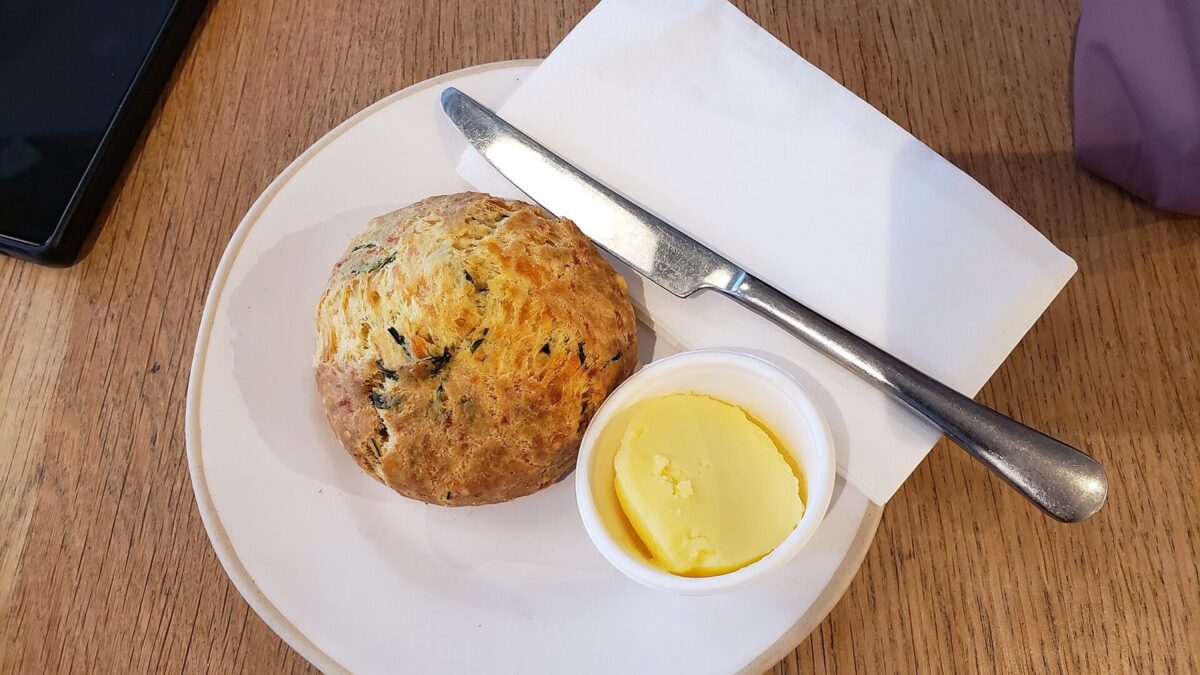
Savoury scones fail in a small number of predictable ways, and every one of them is fixable before you turn the oven on. I have made this batch enough times to have hit all five, usually on a Sunday morning with people already at the table.
Start here rather than at the ingredients list. If you know which failure you are prone to, the recipe below reads very differently.
Prep: 20 mins Cook: 18 mins Makes: 8 scones
Problem: They Spread Into Flat Puddles
Cause: the butter melted before it hit the oven. Butter that is still solid in pea-sized pieces turns to steam inside the dough and pushes the layers apart. Butter that has already softened into the flour just greases it, and the scone slumps sideways.
This happens fastest in a warm kitchen and when you work the butter in with your palms, which run at about 34°C. Use your fingertips, a pastry cutter, or two forks, and stop while you can still see flat flakes of butter the size of a split pea.
Fix: cube the butter and freeze it for 10 minutes before you start. If the shaped wedges feel at all soft, put the whole tray in the freezer for 15 minutes and bake them straight from there. That one step has rescued more of my batches than anything else on this page.
Problem: The Crumb Comes Out Tough
Cause: you kneaded it. Scone dough wants to be handled about eight times, total, and then left alone. Every extra fold develops gluten, and gluten in a scone reads as chew, which is a virtue in bread and a defect here.
The second cause is sneakier: rerolling scraps. If you cut rounds with a cutter and gather the offcuts, that second batch will always be tougher than the first. Cutting the disc into wedges avoids the problem entirely, which is why I do it that way and why the recipe below says wedges.
Fix: bring the dough together with a fork until it is shaggy, tip it out, press it into a disc with the flat of your hands, and cut. If there are a few dry crumbs left in the bowl, leave them in the bowl.
Problem: The Cheese Burns Before the Scones Bake
Cause: cheddar shreds sitting proud on the surface hit 400°F air directly, and grated cheese scorches in about 12 minutes at that temperature while the middle of a 1-inch scone still needs 16 to 18.
Fix: fold most of the cheese in and press any stray surface shreds down into the dough with a fingertip before baking. If you want that dramatic cheese-crisp top, scatter it on for the last 6 minutes only, not at the start. Baking on the middle rack with parchment underneath, rather than a bare dark tray, also buys you a couple of minutes of grace.
Grate it yourself from a block. Bagged shredded cheddar is coated with starch or cellulose to stop it clumping, and that coating stops it melting cleanly into the dough. Block-grated cheddar behaves the same way in a one-pan breakfast skillet of potatoes, eggs and sharp cheddar, melting instead of going stringy.
Problem: They Barely Rise
Cause, in order of likelihood. Your baking powder is old, which is a real thing and easy to test: half a teaspoon in a splash of hot water should fizz hard immediately, not lazily. Or you patted the disc too thin, and a scone cannot rise taller than roughly double its starting height, so a 1/2-inch disc gives you a 1-inch scone. Or you twisted a round cutter as you pushed it down, which seals the cut edge and pins the layers shut.
Fix: 1 inch thick, measured against a knuckle if you have nothing else, and cut straight down with a sharp knife or bench scraper. No sawing, no twisting.
Problem: The Dough Stays Dry and Won’t Come Together
Cause: a cup and a half of cheese absorbs a surprising amount of liquid, and flour measured by scooping straight from the bag can be 20 percent heavier than the same cup spooned in and levelled. Both push the dough dry.
Fix: add buttermilk 1 tablespoon at a time, up to 3 extra, until the dough holds together when you squeeze a handful. It should still look rough and untidy. A smooth scone dough is a warning sign, not a success.
Ingredients
- 2 1/2 cups all-purpose flour, spooned and levelled, plus more for dusting
- 1 tablespoon baking powder
- 1/2 teaspoon baking soda
- 1 teaspoon salt
- 1/2 teaspoon garlic powder
- 1/2 teaspoon freshly cracked black pepper
- 1/2 cup unsalted butter, cubed and frozen 10 minutes
- 1 1/2 cups sharp cheddar, grated from a block
- 3 tablespoons fresh chives, finely chopped
- 2 tablespoons fresh parsley, finely chopped, or 1 tablespoon fresh rosemary or thyme
- 3/4 cup cold buttermilk, plus up to 3 tablespoons more if needed, plus a little for brushing
- 1 large egg, cold
- 1 tablespoon heavy cream or extra buttermilk, for brushing
Instructions
- Heat the oven to 400°F and line a baking sheet with parchment.
- Whisk the flour, baking powder, baking soda, salt, garlic powder, and pepper together in a large bowl.
- Add the frozen butter cubes and work them in with fingertips or a pastry cutter until the mixture looks like coarse crumbs with flat, pea-sized flakes of butter still visible. Stop there.
- Stir through the cheddar, chives, and parsley.
- Whisk the cold buttermilk and egg together and pour in. Stir with a fork just until a shaggy dough forms, adding extra buttermilk a tablespoon at a time only if dry crumbs will not come together.
- Tip onto a lightly floured surface and press into a disc 1 inch thick and about 8 inches across. Do not knead.
- Cut into 8 wedges with a sharp knife, pressing straight down, and space them at least 1 inch apart on the tray.
- Freeze the tray for 15 minutes if the dough feels soft at all. Brush the tops with cream or buttermilk and press down any loose cheese shreds.
- Bake 16 to 18 minutes, until deep golden and firm at the edges. Scatter extra cheddar on at the 12-minute mark if you want a crisp cheese top.
- Rest 5 minutes on the tray before moving them, so the bottoms set.
The Freezer Step That Fixes Most of This at Once
Three of the five problems above are really one problem: temperature. Cold butter, cold buttermilk, cold egg, and a cold tray going into a properly preheated oven solves the spreading, most of the height loss, and a fair amount of the toughness, because cold dough is easier to handle without working it.
So I shape and freeze as a matter of routine. Shaped wedges keep on a tray in the freezer for up to 2 months and bake from frozen with 3 to 4 minutes added, which means scones on a weekday morning with no decisions to make. The same logic applies to buttermilk biscuits, where cold fat is doing exactly the same job.
Herbs That Actually Survive the Oven
Chives are the safest choice and the reason they lead this recipe: they hold their colour and their mild onion note at 400°F. Parsley fades a little but stays green. Rosemary and thyme are stronger and woodier, so halve the quantity, and chop the rosemary finer than you think you need to or you get a needle in a bite.
Basil and coriander are a waste here. Both turn grey and taste of almost nothing after 18 minutes of dry heat, and I have thrown out a tray of grey-flecked scones to prove it.
Serve them split and buttered while still warm enough to melt it, next to something with liquid in it. Tomato soup is the obvious partner and it earns the cliche. If it is a sweeter breakfast you are after instead, the same cold-butter method makes blueberry scones, and if you want the garlic-and-cheddar direction pushed further, take it to cheesy garlic bread and leave the scones alone.