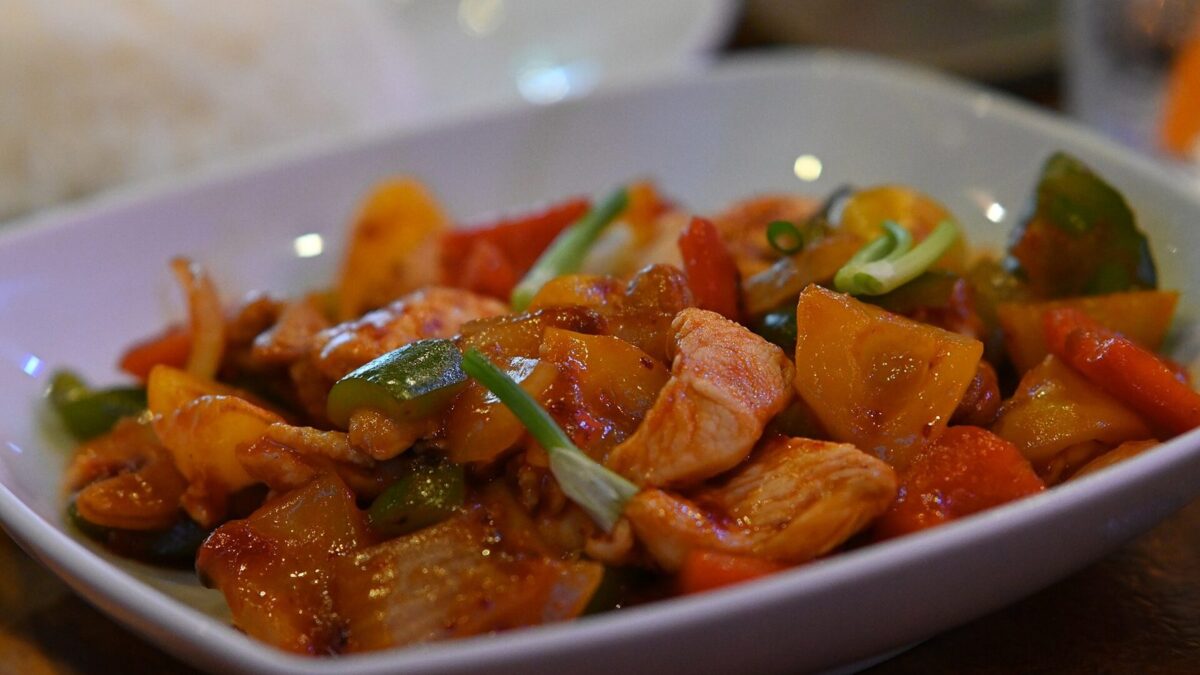
Sweet and sour chicken fails in a specific and predictable order: the coating goes soft, the sauce goes either flat or sharp enough to make you wince, and the whole thing turns slightly gluey by the time it reaches the table. Those are three separate problems with three separate fixes, and this is a long piece because I want to give you all three properly.
I’ve made this dish more times than any other in this category, partly because my nephew requests it every time he visits and partly because for two years I couldn’t get the crust to survive the sauce. I have it working now. Here’s what mattered.
The Coating: Cornflour, Plain Flour, or Both
The single biggest change I made was throwing out plain flour entirely.
Why cornflour stays crisp
Plain flour is roughly 10 to 12% protein, and a good chunk of that protein is gluten-forming. When it hits liquid it develops a slightly elastic, absorbent network. That network is excellent for bread and poor for a crust that needs to stay dry, because it soaks up sauce like a sponge — usually within four or five minutes of tossing.
Cornflour is essentially pure starch, no gluten. It fries into a hard, glassy, brittle shell with a much lower capacity to absorb liquid. When sauce hits it, the sauce sits on the outside for considerably longer. In my kitchen, side by side in the same pan on the same evening, the cornflour batch was still audibly crunchy at eight minutes while the plain-flour batch had gone soft by minute three.
The case for a mix
Pure cornflour has one drawback: the shell is thin and can crack off in sheets rather than staying attached. If that bothers you, use 3 parts cornflour to 1 part plain flour. The small amount of gluten binds the coating together without soaking much up. I use straight cornflour for chicken I’m serving immediately and the 3:1 mix when the pieces have to wait.
The egg step
Beaten egg between chicken and cornflour is doing a mechanical job, not a flavour one. It’s glue. Dip, let the excess drip for a second or two, then into the cornflour. If you skip the egg, dry cornflour has nothing to hold on to and half of it ends up in the oil.
One habit worth stealing: after coating, leave the pieces on a rack for 5 minutes. The cornflour hydrates slightly and grips. This is the same principle behind resting a dredge on crispy fried chicken, and it matters just as much here.
Oil Temperature and the Case for Frying Twice
Bite-size chicken breast cooks through in about four minutes. That’s the whole problem — four minutes isn’t long enough to drive the water out of the coating, which is why sweet and sour chicken is one of the few dishes where double-frying genuinely earns its place.
The temperatures:
- First fry: 163°C to 170°C (325°F to 340°F), 4 to 5 minutes. This cooks the chicken to 74°C (165°F) internally. The coating will be pale gold and slightly soft. That’s correct, don’t panic.
- Rest 5 minutes on a rack. Steam escapes. The surface dries. This gap is doing real work, so don’t skip straight to the second fry.
- Second fry: 190°C (375°F), 60 to 90 seconds. Deep gold, hard shell.
If you only fry once, do it at 175°C (350°F) for about 5 minutes and accept that you have maybe four minutes of crispness after saucing. Perfectly fine on a weeknight. I do it that way more often than I’d admit.
Use enough oil that the pieces float rather than sit. Shallow-frying in 3 tablespoons, as I used to, browns one face and steams the other. In a 24cm pan I now use about 400ml, which is more than the ingredient list below implies and worth it.
Building the Sauce: Vinegar, Sugar, Ketchup
The sauce is a ratio, and once you know the ratio you stop needing a recipe for it. Everything here is by volume.
| Style | Vinegar | Sugar | Ketchup | Tastes like |
|---|---|---|---|---|
| Balanced (this recipe) | 1 | 1 | 1.5 | Takeaway-standard, sweet-forward |
| Sharper, Cantonese-leaning | 1.5 | 1 | 1 | Tangy, less candied, cuts fat better |
| Sweeter, kid-friendly | 0.75 | 1.25 | 1.5 | Closer to a glaze |
In the quantities below that works out to 1/3 cup rice vinegar, 1/3 cup sugar, and 1/2 cup ketchup. If you want the sharper version, take the vinegar to 1/2 cup and leave everything else.
What each one is actually for
Rice vinegar is the backbone. It’s milder than white vinegar (about 4.5% acidity against 5%) and it doesn’t have the harsh edge. If you substitute white vinegar, use about three-quarters as much or it will bite.
Sugar isn’t only sweetness. It’s body. Pull the sugar out and the sauce turns thin and watery even after thickening, because sugar contributes viscosity as it reduces.
Ketchup is doing three jobs at once — colour, tomato, and a hidden dose of both sugar and vinegar of its own. That’s why it’s hard to replace with tomato paste; you’d have to add back both.
Why pineapple juice changes it
Two tablespoons of juice from the tin does more than add sweetness. It brings its own acidity, around pH 3.5, which is sharper than the rice vinegar, and a mix of citric and malic acid that reads differently on the tongue than acetic acid alone. The sauce gets more dimension without getting more sour in a vinegary way.
The tangent worth knowing: fresh pineapple contains bromelain, an enzyme that breaks down protein. It’s what makes your tongue feel raw after eating a lot of fresh pineapple. Tinned pineapple has been heated during canning, which destroys the bromelain, so tinned juice is inert. If you use fresh pineapple juice, simmer it for two minutes before it touches anything else — otherwise it will slowly turn the surface of your chicken mushy while it sits in the sauce.
I use tinned. It’s more consistent in sweetness, the juice comes free, and the chunks hold their shape in a hot pan far better than fresh ones do.
Balancing it in the pan
Taste the sauce before the chicken goes anywhere near it, while it’s simmering. If it tastes flat and syrupy, add vinegar a teaspoon at a time. If it makes you squint, add sugar a teaspoon at a time. Add salt via a splash more soy sauce rather than salt itself. Three or four small corrections beat one large one, and the sauce shifts noticeably as it reduces, so taste again at the end.
Ingredients
- 1.5 pounds boneless skinless chicken breast, cut into bite-size pieces
- 1/2 cup cornstarch, plus 1 teaspoon extra for the slurry
- 2 eggs, beaten
- Vegetable oil for frying (about 400ml for a 24cm pan)
- 1 red bell pepper, chopped
- 1 green bell pepper, chopped
- 1 cup pineapple chunks, plus 2 tablespoons of their juice
- 1/2 cup ketchup
- 1/3 cup rice vinegar
- 1/3 cup granulated sugar
- 2 tablespoons soy sauce
- 1 teaspoon garlic, minced
- Salt and pepper, to taste
Instructions
- Season the chicken pieces with salt and pepper. Dip each into beaten egg, let it drip for a second, then toss in the cornstarch until evenly coated. Spread the pieces on a rack and leave 5 minutes.
- Heat the oil to 165°C (330°F). Fry the chicken in two or three batches for 4 to 5 minutes each, until pale gold and cooked to 74°C (165°F) inside. Lift onto a wire rack.
- Raise the oil to 190°C (375°F). Return the chicken in batches for 60 to 90 seconds, until deep gold and hard-shelled. Back onto the rack.
- Whisk the ketchup, rice vinegar, sugar, soy sauce, garlic, and pineapple juice together until smooth.
- Drain all but about a tablespoon of oil from the pan. Add the peppers over medium-high heat and cook 2 to 3 minutes, until they’ve taken a little colour but still snap.
- Pour in the sauce and bring to a gentle simmer. Taste it now and adjust with vinegar or sugar a teaspoon at a time.
- Stir 1 teaspoon of cornstarch into 1 tablespoon of cold water. Pour half of it into the simmering sauce, stir for 30 seconds, and judge the thickness. Add the rest only if you need it.
- Add the pineapple chunks and warm through for a minute.
- Turn off the heat. Add the chicken, toss for no more than 20 seconds, and serve immediately.
Thickening Without Turning It to Jelly
Cornflour slurry is unforgiving in one specific way: it doesn’t reach full thickness until the sauce has been at a simmer for 30 to 60 seconds after you add it. Judge too early, add more, and by the time both doses activate you’ve got something with the texture of jam.
So: half the slurry, wait 30 seconds, look at it. A finished sweet and sour sauce should sheet off the back of a spoon and leave a coat you can draw a line through with your finger, and the line should close up slowly rather than hold open. Held open means too thick.
Cold water, always. Slurry made with warm water starts gelatinising in the cup and goes in as lumps you’ll never whisk out. And whisk it again immediately before pouring, because cornflour settles to the bottom in under a minute.
If you have overshot it, thin with a tablespoon of water or pineapple juice at a time over low heat. Water dilutes the flavour; juice doesn’t, which is the better option most of the time.
Keeping the Crust Crisp Once the Sauce Hits
Heat off, sauce thickened, chicken in last, toss for 20 seconds, plate. That’s the whole discipline, and it’s the part people get wrong because it feels rushed.
Every extra 30 seconds the chicken spends swimming costs you crispness. If I’m serving four people I keep the sauce and the chicken separate right up to the moment plates are on the table, then combine in the pan and carry it straight through. For a buffet-style spread I don’t combine them at all — sauce goes in a bowl, chicken goes on a platter, and people spoon it themselves. Slightly less authentic and much better eating.
Leftovers won’t be crisp, and pretending otherwise leads to disappointment. Store sauce and chicken separately in the fridge for up to 3 days, reheat the chicken in a 200°C (400°F) oven for 8 minutes to bring back some structure, warm the sauce in a pan, and combine at the last second. Microwaving the two together gives you something soft that tastes fine and looks sad.
For the rest of the meal, plain steamed rice is the right call over anything flavoured, because the sauce is already carrying a lot. Vegetable fried rice works if you go light on the seasoning in it. If you want a second dish on the table, 20-minute teriyaki chicken bowls repeats the chicken, so I’d reach for thai green curry instead for the contrast in heat.