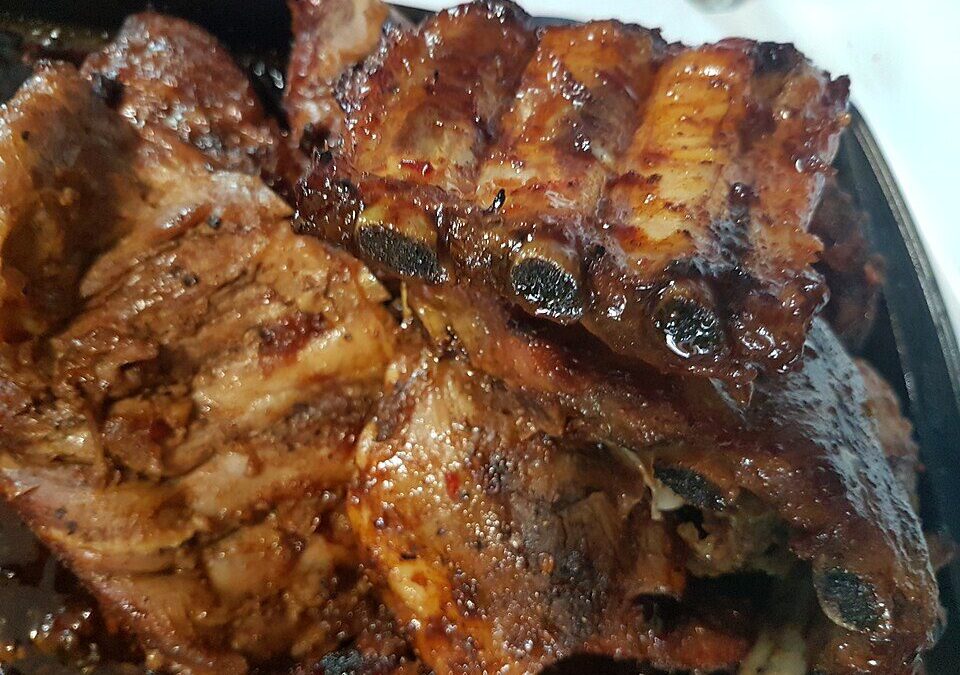
Three methods get argued about for home ribs: oven low and slow, foil-wrapped braise, and boil-then-grill. They do not produce similar results, and one of them is genuinely worse than the other two. I have made all three on baby backs from the same shop, in the same month, so this is a comparison and not a survey.
Prep: 15 mins Cook: 165 mins Serves: 4
Three methods, side by side
| Method | Time | Texture | Flavour |
|---|---|---|---|
| Oven, low and slow, uncovered at 135C / 275F | 3.5-4 hrs | Firm bite, meat still clings slightly | Best. Rub forms a real bark |
| Foil-wrapped braise at 150C / 300F | 2.5 hrs + 20 min glaze | Softest. Falls off the bone | Very good, but no bark under the foil |
| Boil 45 min, then grill | 1.5 hrs | Soft, sometimes stringy | Noticeably flat |
Boiling is the one to drop. It is fast and it does tenderise, but you are pulling gelatin, fat and a good part of the pork flavour out into a pot of water you then pour down the sink. I made a batch this way and tasted the cooking liquid afterwards out of curiosity: it was a light, meaty broth. Every bit of that came out of the ribs. The meat that was left tasted washed, and the sauce had to do all the work.
Between the other two, the honest answer depends on what you want. Uncovered low and slow gives the better eating experience: a dry rub that has actually set into a crust, meat that pulls cleanly off the bone but does not collapse, and edges you can chew. It costs an extra hour and it is fussier about oven accuracy.
The foil braise is the one I actually recommend to most people and the one written up below, because it is nearly foolproof. Steam trapped in the parcel converts collagen to gelatin reliably even if your oven runs 15 degrees off. The trade is that nothing browns under foil, so all your crust has to be built in the final glazing stage.
My verdict, stated plainly: foil braise for a weeknight or for anyone cooking ribs for the first time, uncovered low and slow when you have the afternoon and want the better rack.
The membrane: I take it off, and here is why that is not fussiness
On the bone side of the rack there is a thin, silvery sheet of connective tissue. It does not break down. Three hours at 150C leaves it exactly as tough as it started, and it sits between your rub and the meat like a plastic film.
Slide a butter knife under it at one end, get a corner up, then grip it with a paper towel and pull steadily along the rack. It usually comes off in one piece and takes about twenty seconds once you have done it twice. My first attempt took five minutes and came off in eight shreds, which is normal.
Some racks arrive with it already removed. Run a fingernail across the back; if it is smooth and slightly slippery it is still there, if it is bumpy with visible bone edges it is gone.
Sauce early or sauce late: not actually a close call
The glaze here contains ketchup, honey and brown sugar in the rub. Sugars start browning meaningfully around 160C and burning not long after.
Brush that glaze on at the start of a three-hour cook and you get a black, bitter shell. I did this once with a hoisin version and the bitterness went right through to the meat underneath.
Sauce goes on in the last 20 minutes, and in two thin coats rather than one thick one. The first coat sets and gives the second something to hold onto, which is how you get a lacquer instead of a slick. Ten minutes, brush again, eight to ten minutes more. Stand at the oven for the last stretch. Sugar goes from glossy to scorched in about ninety seconds.
The one exception is the dry rub, which goes on at the very beginning. Two tablespoons of brown sugar spread across two racks is a small enough amount that it caramelises rather than burns under foil.
Ingredients
- 2 racks baby back pork ribs, about 1.8kg / 4 lb total
- 2 tablespoons brown sugar, for the rub
- 1 tablespoon smoked paprika
- 1 tablespoon garlic powder
- 1 teaspoon onion powder
- 1 teaspoon salt, plus black pepper
- 1/2 cup ketchup, for the glaze
- 1/3 cup honey
- 3 tablespoons soy sauce
- 2 tablespoons rice vinegar
- 2 cloves garlic, grated
- 1 teaspoon chili flakes, optional
Instructions
- Heat the oven to 150C / 300F. Pat the ribs dry and pull the membrane off the bone side, using a paper towel for grip.
- Mix and apply the rub. Combine the brown sugar, smoked paprika, garlic powder, onion powder, salt and pepper, and press it into every surface of both racks. If you have the time, leave them rubbed in the fridge for 4 hours or overnight; it seasons deeper and dries the surface.
- Wrap each rack tightly in foil, shiny side in or out, it makes no difference, and set them on a baking sheet in case a parcel leaks.
- Bake 2 hours 30 minutes. Baby backs at this temperature are usually there; a meatier spare rib rack may want 30 to 45 minutes more.
- Make the glaze while they cook. Whisk ketchup, honey, soy sauce, rice vinegar, grated garlic and chili flakes in a small pan and simmer over medium-low for about 8 minutes, until it coats the back of a spoon and a line drawn through it with your finger holds for a second.
- Check doneness before you unwrap for good. Open one parcel and lift the rack a third of the way along with tongs. It should bend to roughly a 90-degree droop and the surface should crack slightly. A skewer between the bones should go in like it is going into soft butter. Internal temperature in the meat between two bones should read 90 to 96C / 195 to 205F.
- Unwrap and drain. Pour off the juices in the foil, which are worth keeping for beans or rice, and turn the oven up to 220C / 425F.
- First glaze coat. Brush both sides, return uncovered for 10 minutes.
- Second coat. Brush again and give it another 8 to 10 minutes, watching closely, until the surface is bubbling and darkening at the edges.
- Rest 5 minutes, then cut down between the bones with a heavy knife, bone side up so you can see where the gaps are.
The bend test, and the numbers behind it
Ribs are the one cut where a thermometer alone is not enough, which trips people up. Collagen converts to gelatin over time as much as over temperature, so a rack can hit 92C in a hot oven and still be chewy because it has not been held there long enough.
So use both. The thermometer tells you if you are in the window at all: below 88C and it is definitely not ready, 90 to 96C is where the collagen has broken down.
The bend test tells you if you are actually there. Lift the rack with tongs about a third of the way along and watch the far end. Stiff, barely moving: keep going. Drooping to about ninety degrees with the crust cracking across the surface: done. Splitting in half and falling apart in the tongs: overcooked, though frankly people who like fall-off-the-bone ribs will be pleased.
Competition cooks pull ribs firmer than most home cooks want. If you like meat that stays on the bone until you bite, aim for the low end, around 90C. If you want the fall-apart version, go to 96C and check the parcel every 15 minutes past that point.
Reheating without losing the glaze
Ribs keep four days in the fridge and reheat better than most cooked meat, because all that gelatin holds moisture.
Wrap the portion in foil with a tablespoon of water, warm at 150C / 300F for 15 minutes, then unwrap, brush on fresh glaze, and put them under a hot grill for 3 minutes. Skipping the fresh glaze is the mistake: the original coat rehydrates into something tacky and dull rather than glossy.
Freeze them glazed, not unglazed, in portions of four or five bones. Three months is fine. Thaw overnight in the fridge, because reheating from frozen dries the outer layer before the middle warms.
For the table, creamy coleslaw and cornbread are what I put out every single time, the slaw for acid and crunch and the cornbread to mop the glaze. If you have leftover meat and not enough bones to go round, pull it off and treat it like the filling in the bbq pulled pork sandwich. And for the same sweet-savoury glaze on a much faster weeknight cut, the honey garlic glazed pork chops are a 30-minute job.